Magento 1 End Of Life: It’s time to migrate to Magento 2

Magento announced that it is pulling the plug on Magento 1 in April 2017 at the ‘Meet Magento’ conference in Prague. The announcement caused a frenzy amongst developers and business owners. However, Magento later cancelled the End of Life and announced an 18-month notification policy for the EOL date. Even though the End of Life has been delayed, it’s high time you start planning Migration to Magento 2. Magento’s team will provide support for Magento 1.13.x and 1.14.x Enterprise editions, but only till June 2020. The support for Magento 1 community edition is no longer available. End of support on Magento 1 means that there will be no further development. With no security patches, your business and data will be at risk. This would leave your website vulnerable to hackers. Apart from security you might also face the following issues if you decide to delay the upgrade:
  • Increased maintenance costs
  • Lack of support for extensions
  • PCI compliance issues
  • Lack of speed (Magento 2 is faster)
Magento has provided you with the timeframe to understand the database, compatibility, and integration needs for a smooth migration and upgrade. As most of the current Magento websites are running on Magento 1, the users currently have two options:
  • Start planning the migration to Magento 2
  • Stick with Magento 1 for a while till a glitch makes it urgent.
Moving to Magento 2 will change your website’s game. It easily handles huge traffic and aids faster checkouts. As per previews, the stores in Magento 2 load 30–50% faster than Magento 1. Magento 2 solves the problem of slow page loading speeds and checkouts, resulting in lesser transaction failures and more business! As Magento 2 is based on a different architecture, the migration will be a time-taking process. It is highly advised to get a team of Magento experts on board and get on with it. Bottomline, GET IT DONE NOW! DO NOT PUT THE UPGRADE ON PENDING TASK LIST! Migration to Magento 2 is a walk in the park if you have right development partners onboard. Get a Magento expert here!

ACF vs Visual Composer website builder: Which is better?

Building a WordPress website? The WordPress community provides you with plenty of options. You can either make an easy one using WordPress themes or a custom one using website builders. A website builder is the most convenient way to make a personalised website. WordPress community provides you with a ton of free and paid builders as per your needs and levels of expertise. Once you make up your mind on what you plan to do with your website, then you can chalk-out the structure and the elements that you’re going to need for the website to function. After locking in your requirements, you can choose your website builder. We recommend using two of our recent favorites.
  • ACF
  • Visual Composer

ACF

Image Source: advancedcustomfields.com

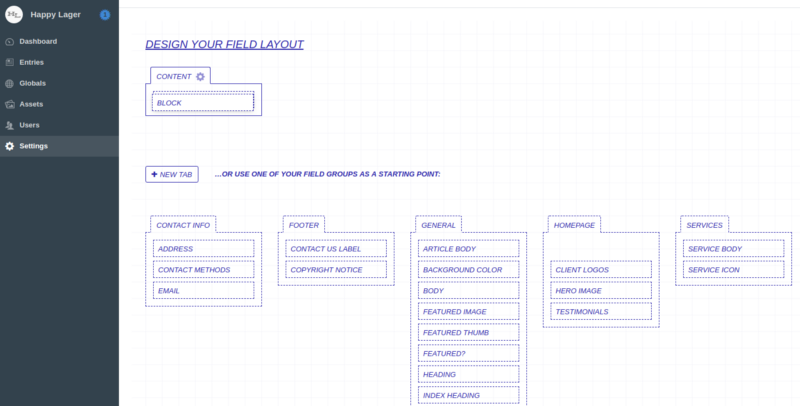
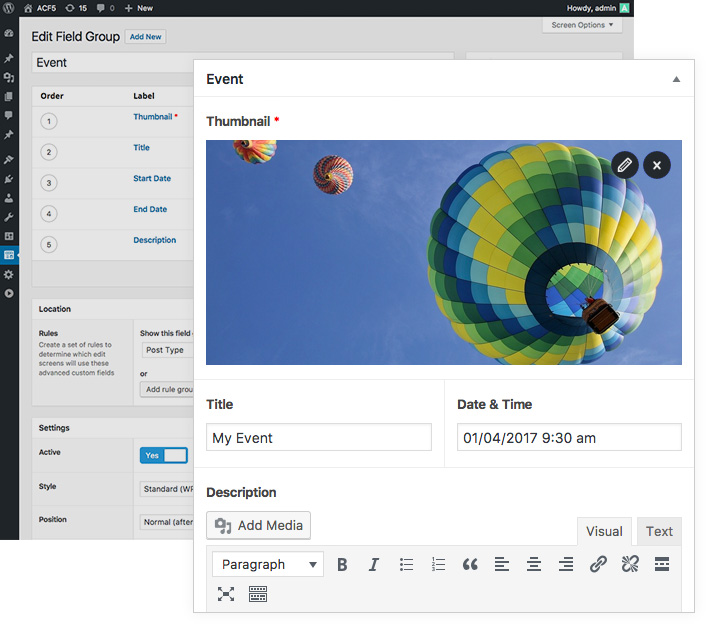
The interface of the Advanced Custom Fields is simple. It lets you create dynamic fields for individual elements of your website. Installation and activation of ACF adds Custom Fields to your WordPress dashboard. From the Custom Fields menu you can take full control of your edit screen & custom field data. The minimalistic interface of ACF can be mistaken for an under equipped website builder. You can make some of the most complex and powerful websites with ACF. The best thing about ACF’s interface is that it doesn’t try to overwhelm you. It only shows the functions that you need. ACF gives you the full control of your website right from header to footer. You can build individual elements of your website with custom fields. There are 25+ different field types to choose from, vis-a-vis. text, image, gallery and WYSIWYG editor. These fields are dynamic. You can use them to give your client an easy way to update their website according to their liking.
Visual Composer

Image Source: visualcomposer.io

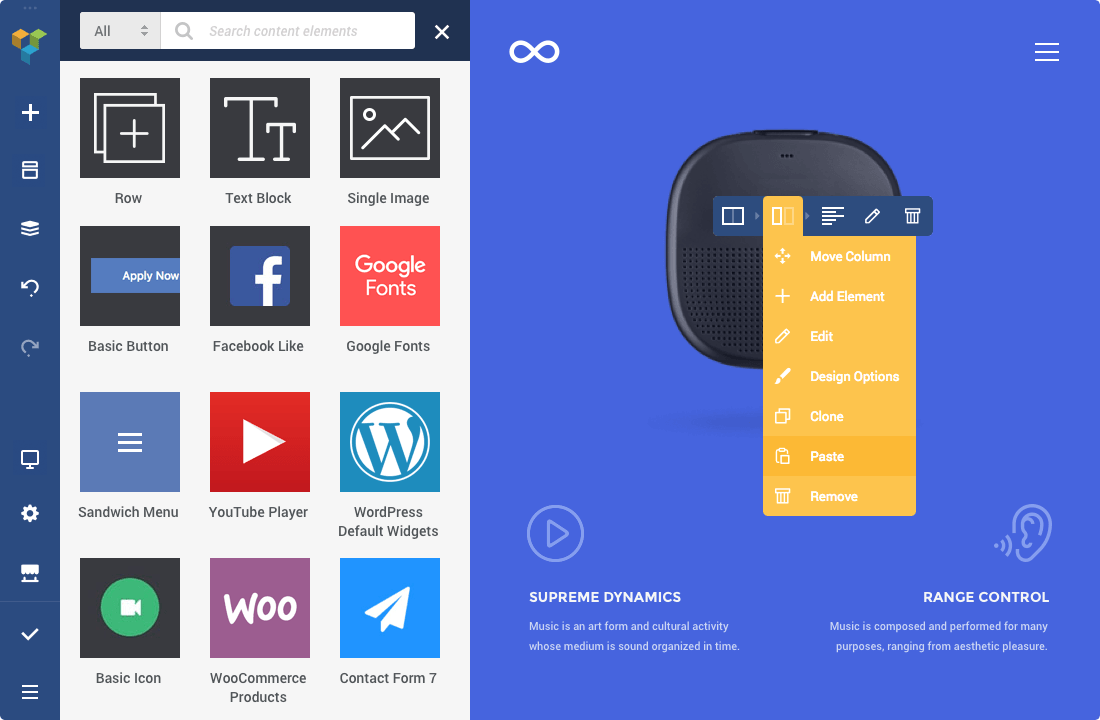
It has a clean and modern interface which allows you to make basic layouts with ease. The interface lets you work on different elements of the website, right then and there. Visual Composer has a floating window which pops up every time you’re trying to add or edit an element. The window is movable and resizable, you can place it anywhere if it’s obstructing your view. Visual Composer gives you the best of both worlds with its backend and frontend editor. While building, you can easily choose from the ready-made layouts of landing page, call to action page, feature list, description page, service list or a product page. Adding elements in the website is also easy with the element window. The drag and drop visuals come at a cost of short codes. Migrating to another website builder or uninstalling Visual Composer leaves short codes in the content, rendering it unreadable. Fixing these short codes is an another chore on its own.

Which one do we prefer over another, you ask?

Well it’s a tough choice but…ACF! ACF and Visual Composer are serving two different audiences. ACF is focused on developers. Visual Composer on the other hand targets the people with little to no knowledge of website development. In case of both the builders. the audiences don’t need to have an extensive coding knowledge. Visual Composer focuses on making the website building experience as easy as it can be. Visual Composer is not made for complex websites it will only provide you with enough elements to get your website up and running.

Why ACF?

ACF does a commendable job with its active development and incredible support. The developers are constantly working to keep the plugin current. The heavily themed interface of Visual Composer is slow. The floating window takes time to load the elements, and the builder shows glitches when you switch from frontend to backend. Visual Composer is affordable for personal license but expensive for client work. ‘Advanced Custom Fields’ is more affordable and provides value for money. Another thing that doesn’t work in Visual Composer’s favor is that the pre-sales service and overall support for Visual Composer is terrible. It comes as no surprise that ACF has 900,000+ active installations compared to Visual Composer’s 500,000+. You can save your time and money with theme-based websites but you might not get the exact thing you’re looking for. Themes are designed keeping a universal requirement in mind. Your unique requirement might not fit in those templates everytime. But, if you have unique requirements and want the best for your website, then website builder is the right bid. Making custom websites is a hectic process. We can make that process easier. Our expert development team knows website builders like the back of their hands. Hit us up here if you’re looking for WordPress development partners.

WhatsApp Business API: What’s in the limited public preview?

Facebook has finally decided to monetize WhatsApp.

Earlier this month, on August 1, Facebook rolled its long-in-development WhatsApp Business API for medium to large businesses. This is not to be confused with WhatsApp business application, which is only meant for small businesses.

The business API will let you communicate with your customers all over the world, in real time.

The API allows you to make a business profile on WhatsApp. You can include all the necessary information like address, business description, email address, phone numbers, and website.

The motive of the API is to bridge the gap between businesses and their customers. WhatsApp currently has an active user base of 1.2 billion members. The business API might become the goldmine for customer services and marketing. It is the most convenient place to provide services and support to your customers.

You can use the API to send notifications such as shipping confirmations, appointment reminders, event tickets, tracking details etc.

For the initial release though, the API comes with some limitations.

Businesses cannot send messages to WhatsApp users until the users have initiated a contact, for example making an order or booking a ticket.

There is also a limit on outbound message rates. The tested maximum outbound message rate is 15 message/second.

The API not only allows you to connect directly to your customers but it also keeps an insight on the messages and response rates. You can access these message analytics in the dashboard.

The business API comes with some useful features:

  • Instance monitoring- You can export internal metrics in prometheus text format and use the obtained data to analyse the performance.
  • Message templates- You can create different message templates for different instances & situations. You can also set locales for different languages.
  • Verified name- Your business profile gets a verified name with which you can communicate with your customers. The verification badge ensures authenticity and establishes trust amongst the users.
  • Labels- The chat can get clumsy. Labels can help you sort your customers and chats. Create Labels and organize your chats accordingly.

Similar to the basic WhatsApp app, all the information between the business and the clients will remain end-to-end encrypted.

The API is currently in a limited public preview. You can submit your application here for consideration if you want to get the business API.

How to use Macros with Twig in Craft CMS — DRY

Templating is one of the most commonly used processes in web development. It helps with easier management during the development & design process. Apart from the management, templating helps with keeping the visual consistency.

Craft CMS comes with a cool templating engine — Twig. And we love to use macros to work on redundant parts while working on a Craft CMS project. Macros can be compared to ‘functions’ in PHP also known as DRY templating in other languages. We usually use it to generate markups that have slight final variations in the implementation.

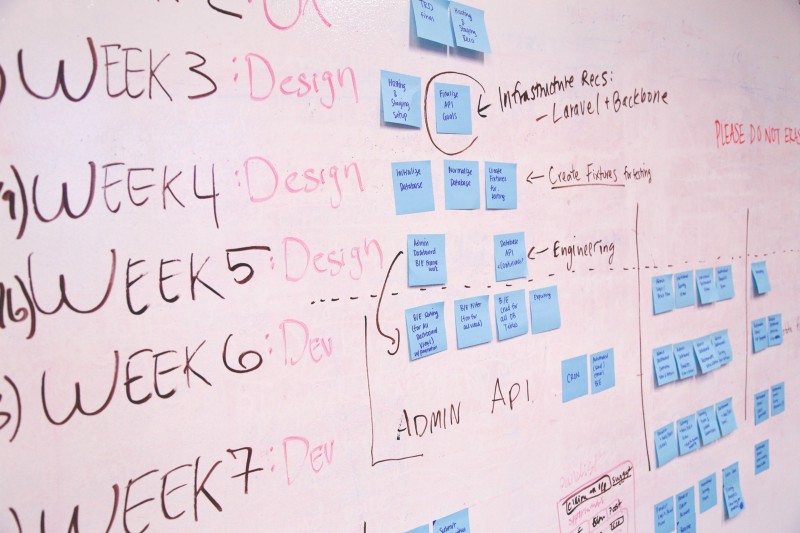
To simplify your code you must first make a visual hierarchy of the page you’re working on. That way you can determine the components you’re going to need. Make macros for those components in the twig templating engine.
Macro implementations can be changed based on the parameters passed to it. For instance footers, dates, images and other media are a recurring part of a website. You can make macros for these components.

Skeleton of Twig Macro

{% macro coolMacroName (parameter 1,…..) %} {content of macro goes here} {% endmacro %}

To call the macro – {% import ‘_macroFilename’ as ‘macroVariable’ %} {{ macrovariable.coolMacroName(parameter1, parameter2,….) }}

The best practice is to add the relevant macros to a file and then call the file as a variable. Use the variable to call the macro at the places you need.

The first Macro we use often is-

Macro for responsive image component in Craft CMS

You can reduce and automate a lot of work which goes in responsive image formatting. Utilize Craft’s ‘Image transforms’ with a twig for images and define your transform macros in it. You will also have to define different types of macros for different image formatting needs.
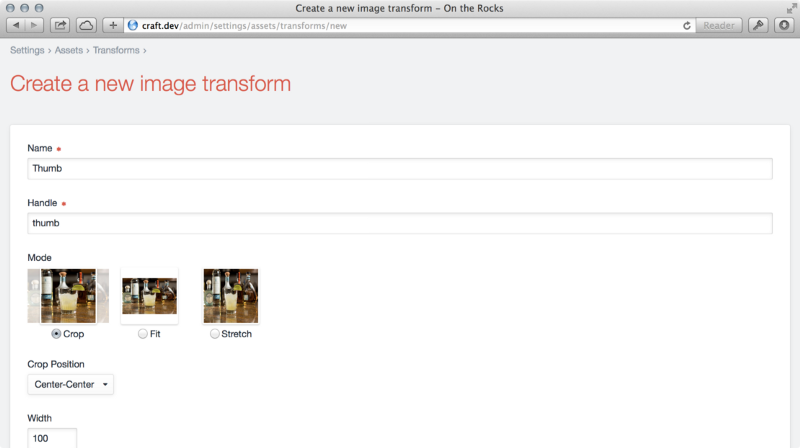
A macro for Device-pixel ratio adaptable fixed size images and other one for variable size responsive images. Also add an internal class to call it inside your twig image file for additional attributes.

Macro for video component in Craft CMS

Videos are an integral part of every website, so making a twig component for it seems practical, otherwise you will spend your precious time writing and tweaking html code for videos.

In the macro define the logic of the video component. The file should have proper information about the component, the parameters which are accepted, the value each parameter requires, and whether the parameter is optional or not. You also need to mention, what the arrays and objects are made of because without that information you yourself and other developers won’t know, what information can/must or cannot be passed while calling the component.

Making macros for date formatting in Craft CMS

Dates might look like a trivial part of a template but it gets tedious and complex when you have to define its format in every other template.

You can contain different modifiable date formats in a macro. It saves you the effort of having to define it time and again and maintaining consistency all along. Short or long, just define the format in a macro and call it wherever you need it.

Reduce repeated reference of paths in Craft CMS

Include tag in twig allows you to call a template within a template. Each one you make gets stored in /templates/ folder by default, even your include templates.

You can call these partial templates separately followed by the same path or make a macro instead to reduce the repeated reference of path.

To achieve code consistency, store your ‘include’ templates separately. So that you can call the include templates within the macro. You can also call your ‘include templates’ from multiple locations.

Final words

That’s pretty much it. Apart from few other variations, creating macros for page components is a good and effective way to reduce the redundancy and complexity of the code. You can always go through this detailed video for macros here.

We’ve been experimenting with several DRY techniques ourselves. It improves the speed of our work cycle.

How are you using Twig & its components? If you need help with your Craft CMS project, connect with us right away.

Craft Vs Perch: A Clash Of Customizable CMSs

In our earlier blogs we’ve favoured Craft CMS heavily because of its ‘content first’ philosophy. Perch also majorly focuses on the content but with functionality shredded down to the absolute basics. It’s so minimalistic and that it is considered to be appropriate for small-scale projects only. Anyways, Perch has its perks as compared to conventional CMSs. Let’s put it to the test against the reigning champion, Craft CMS.

Feature comparison of Craft & Perch

Craft is loaded with crucial features, vis-a-vis:

Live Preview

Craft allows you to review the edits as you’re making them in a split screen window mode.

Matrix

Gives you the full control of your content, from layout and placement to the order.

Localization

You can create locales for the desired language and enable with just a click.

One-click updates

Simply update everything with one click from the control panel. The updater even notifies you according to the nature of the update; whether it’s incremental or critical.

Built from scratch

Craft CMS team clearly states that we don’t make any assumptions about your content. You get full control of your website and you can craft it the way you want. On the other hand, Perch has the following features to offer:

Preview

You get to see the changes only after when they are saved in the draft. A bit old fashioned to be honest but it goes with Perch’s tagline of ‘a very little CMS’

Custom Fields

The feature lets you create custom fields throughout the page.

Localization

Perch lets you localize your webpages by creating separate pages or duplicating regions for each language.

Updates

Updating in Perch is a bit cumbersome. You need to replace the old files with the new ones.

Retrofit or build from scratch

You can retrofit an existing website or build a minimal website from scratch.

Documentation comparison of Craft & Perch

Documentation is a crucial part of a CMS. It is important to define the features and inner workings of a CMS so that the new users know how to use it. It’s a map for the CMS users. Documentation, if not done properly, might mislead your users. There is nothing more off-putting than lack of documentation. Users are trying to find their way around the new CMS and if there is no good map, they’ll probably get lost and bounce-off faster than light from a mirror.

Craft

As far as the documentation is concerned Craft excels at it. You will immediately find everything you’re looking for. From update logs and feature definitions to essential how tos; Craft’s documentation has got it all.

Perch

Being the older CMS of the two, extra years in development hasn’t added much in favour of Perch CMS. Perch documentation is enough to get a hold of the basics but it disappoints when you’re half-way into the development process. Especially when you’re trying to give additional functionalities to your CMS with add-ons.

Community Support comparison of Craft & Perch

Documentation can only do so much, the real knowledge and solutions are derived from the dedicated communities formed around the CMS. The community makes up for the lack of documentation and helps you solve on-site issues.

Craft

Craft has a proactive community of dedicated developers and users that help to keep Craft as current as it can be. The Craft community just keeps growing as more people fall in love with the CMS.

Perch

Perch doesn’t aim to be a big CMS and hence it remains that way with 0.1% of the market share. It has a simple and functional CMS to offer but it’s not backed by convenient documentation and a good community support.
  • Perch Slack channel is no longer active
  • 3725 followers on Twitter
  • 615 fans on Facebook

User Interface comparison of Craft & Perch

User interface determines how you interact with the content. Both the CMSs provide you with a dashboard to edit and manipulate your content using the interface. The simpler the interface the lesser the struggle to understand it.

Craft

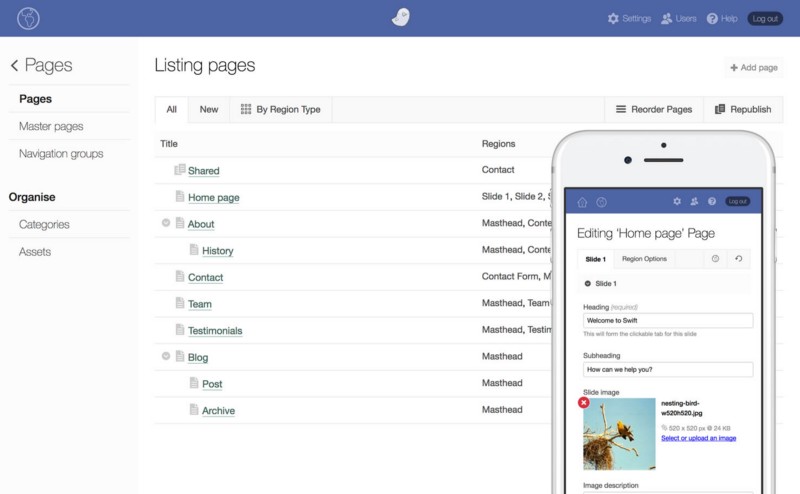
Craft focuses on providing powerful and bespoke results. The interface hence is equipped with essential functionalities to handle large amounts of data gracefully. Although it is considered to be highly-technical and dev-friendly, Craft CMS offers a conveniently easy drag and drop interface for layout design.

Perch

Perch on the other hand stays true to its principle of being basic with the user interface too. It is comprehensive and doesn’t require extensive technical expertise. However to people who want more control over their content it is basically under equipped.

Development Cycle comparison of Craft & Perch

Craft uses an unconventional and complex data structure, hence the bigger learning curve. Singles, structures, and channels as data structures give you unmatched control and editing capabilities. For front-end development Craft utilizes Twig templating engine for advanced templates and data manipulation. Perch uses PHP functions for the development as compared to Twig in Craft. The content structure is pretty straight forward, it features pages, regions, and shared regions for data manipulation. For the added functionality of reusing content throughout the page you need to upgrade to larger version of Perch which is Perch Runway. Both the CMSs have their benefits but it is rather important and practical to go with the CMS which is flexible and future-proof. While Perch is a straight forward CMS which doesn’t try too hard to be something it’s not, it is only good for small projects and businesses with a tight budget. On the contrary, Craft CMS provides necessary functionalities paired with high-end security. It is a capable and viable choice for both developers and content editors. Looking at the security track record of Craft we’ve always chosen Craft CMS over every other CMS for our clients. In case you are confused about how