Did you ever happen to spot some inconsistencies in your product’s design that were not there in your prototype? The color being a bit different, some changes in the font style or micro interactions not working the way they are supposed to.
You think that some of these errors could have been avoided if a designer was shown the coded version before the app release. And you are not alone in thinking like this. There is a solution to combat this problem.
The answer is… Design QA.
So what exactly is Design QA and how does its implementation resulted in streamlining our product cycle. Here are some tips and tricks for you that we learned along our journey.
Defining Design QA:
Design QA is a cross verification process done by designers. It entails checking for any inconsistencies in your copy, visual aspects, micro interactions, and the likes of the code developed before the release of your product.
Why is it neglected from design sprints?
In many organizations, design sprints are very elaborate, taking a full week or longer. And this is prior to the developer hand off. Once this is done, designers move on to other projects with no further updates on the previous product. Bringing designers back for the review is not considered by many. And some other common reasons we hear for neglecting design QA are:
A misconception in the design world is that a designer’s work is done after forwarding Zeplin links and Invision prototypes. But that is seldom the case.
Design QA discussion can cause friction between designers and developers, making it an uncomfortable conversation to have at times.
Design QA is seen as an add on step in an already elaborate design sprint. When teams are working under time constraints, collaborating with designers for more reviews is not ranked high on the priority list.
Why did we implement it in our process?
The reasons for design QA to be a part of our process is nothing different from what the experts vouching for it say. We pitched it to our clients explaining its importance and what benefits will they get after its successful implementation. Some major factors that drove us to inculcate it within our process were:
It’s a pretty underrated time saving hack
Design QA will be good for your long term goals. Getting a few extra hours of your designers is better than a few extra days of your developers to search, spot, and iterate for design inconsistencies after the app release.
Better collaboration between your designers and developers
When designers and developers are in the same room (or call) it will help in solving the issues at hand quickly. Your designers will be aware of the technical issues that developers are facing and will account for such issues in the future.
Developers will also get insights into how designers have envisioned the final product and code to bring out the same in the product.
No surprise design inconsistencies
A designer’s work does not end after a simple functionality test of buttons and interactions. Instead, they evaluate the design elements behavior right from the speed of the interaction to the feedback of an action being performed, will there be a slide-out option or slide in, you get the picture.
Minimum design debt
Design debt is accrued over time when small changes and improvements are kept for the next sprints every time they are brought up. As this pile keeps on growing, it results in a bad user experience. And there will be a point where no amount of small tweaks will make it better and you end up rewriting your whole product.
Integrating Design QA in our existing process ensured that we never went back to square one because of design debt.
You’re convinced that it belongs in your process, now how do you implement it?
We know that it is easier to say rather than execute any changes in your workflow. But how to transition from ‘thinking’ to ‘doing’? Here are some tips that have helped us in including design QA within our workflow.
Start out together
The first and most vital thing that we have learned is to involve stakeholders from various product stages in the initial meetings. This helps in seeing the feasibility of the product’s features and setting the right expectations for everyone onboard.
Sort issues on the basis of priority
You will face numerous issues when testing the final product from the design point. But not all these issues have to be solved right away, some can wait till the next sprint cycle or are the icing on the cake type features.
When discussing with your developers, define priorities to get the critical issues addressed before ones that are only for aesthetic value addition, this way you are making your developers life a tad bit easier.
Have a checklist ready
We all know how good our memory is when we need it the most. Having a reference checklist when design QA is carried out will ensure that we don’t miss out on essential checks. Look for text alignment, colors, content placement and spacing.
You also need to check for the accessibility of the design. Here again, a checklist sorted on priority basis makes it easier for everyone involved.
Start the review the moment you get your hands on functional prototypes
We believe that there is no fixed timeline that needs to be followed when it comes to review cycles. Infact, the earlier the review cycle starts, the better. Waiting till the last moment can lead to unexpected delays in the launch of your product.
Getting a designer review on the product’s features will keep the development going in the right direction.
Give reasoning behind your feedback
Just saying that “this does not look/feel right” defeats the purpose of reviews. You should back your reviews with proper reasoning and even document them for references. This will not only help your developers but your designers as well to evaluate what they like the best and why.
Design QA has helped us ship perfect products reflecting the original design intents. This has worked wonders for us, especially when collaborating remotely. To get your stakeholders onboard, you can utilize the same reasoning that aided us in actively streamlining our workflow.
For over 35 years, NHLS has been a robust source for enterprise technology and software training solutions offering industry-leading learning content. They provide computer courses and certifications to more than 30 million students through in-person and online learning experiences.
Understanding the challenges
NHLS turned to Galaxy to check the load the platform can withstand under certain user scenarios over different web pages, and wanted the system to be able to entertain 10,000 concurrent users. They expressed concerns over the performance of their learning platform seen during user interaction.
They wanted us to go for performance testing to pull off higher volume load tests, and implement required measures to optimize website load times and ensure zero-downtime during the busiest days.
Test planning and implementation
We developed an in-depth understanding of the client’s system architecture and the platform. We used Jmeter to simulate heavy loads on virtual servers, networks to check strength, test the ability to handle heavy loads and determine system performance for a variety of loads.
We started with 1000 users. Reports of regression and stress tests made it pretty clear that the webapp is not optimized, since even after the FMP (first meaningful paint), the load times were far from what we expected. Servers were running out of capacity even on a few requests, which was not ideal for the server architecture NHLS already had.
Their application concurrency target was 10,000 users which was initially crashing at 100 users. In order to identify the point of bottlenecks due to which application started degrading performance, we defined few performance test objectives:
Response Time: To check the amount of time between a specific request and a corresponding response. User search should not take more than 2 seconds.
Throughput: To check how much bandwidth gets used during performance testing. Application servers should have the capacity of entertaining maximum requests per second.
Resource Utilization: All the resources like processor and memory utilization, network Input output, etc. should be at less than 70% of their maximum capacity.
Maximum User Load: System should be able to handle 10,000 concurrent user load without breaking database by fulfilling all of the above defined objectives.
Bottlenecks we encountered and the Solutions we provided
We used Jmeter to start testing with 100 users and then ramped up progressively with heavier loads. We performed real-time analysis and conducted more thorough analysis using a variety of tests like load test, smoke test, spike test and soak test.
In order to get to grips first with inaccurate page load and slow page speed, we decided to test per page load. We onboarded with our team of developers and network/server engineers to look into the bottlenecks and solve the issues to get expected results.
Bottleneck #1: Obsolete code
Adding new features to old coding architecture accumulated unnecessary JS and CSS files, code controllers and models on every page. This was acquiring cumbersome and resource-heavy elements or code throughout the website, and exacerbating the page load.
Solution:
We minified static assets (JavaScript, CSS, and images) i.e. optimized scripts and removed unnecessary characters, comments and white spaces from the code to shrink file sizes. To further improve the page speed, the server team performed static code caching that reduced the bandwidth usage from the website.
This resulted in a significant size reduction in requested assets and improved the page speed taking only 2 seconds to load the home page.
Bottleneck #2: Memory
A single query was processing more data than needed, mainly accessing too many rows and columns, from so many parts of the database. This in case of large tables means that a large number of rows were being read from disk and handled in memory causing more I/O workload.
Solution:
We used RDS Performance Insights to quickly assess the load on the database, and determine when and where to take action, and filter the load by waits, SQL statements, hosts, or users.
We performed indexing, removed redundant indexes and unnecessary data from the tables to quickly locate data without having to scan/search every row in a database table every time a database table is accessed. Server team used Innodb storage engine for MySql to organize the data on disk to optimize common queries based on primary keys to minimize I/O time (minimizing the number of reads required to retrieve the desired data).
Bottleneck #3: CPU
Use of nested loops to process large data sets made it difficult to trace the flow of the code, hitting so many requests (1-10k requests) on the database by a single user. This caused the code to execute multiple times in the same execution context hitting the CPU limit and driving up its usage.
Solution:
We performed query performance optimization to remove unnecessary code in loop (by making sub queries of queries) and removed multiple loops thus reducing time of rendering content from looped code that resulted in sending only 100 requests by a single user now. This reduced page size, response time, and marked down CPU resources and memory from 8GB to 4GB on the application server.
Ridding the code off of redundancies and optimizing the database helped us get to the 5000 user traffic mark. This lessened the extra work of the MySQL server, reducing server cost to 10-20%.
We launched a single server on AWS and configured all the required packages such as Apache, PHP and PHP-fpm, load balancer, and others to run our application.
Bottleneck #4: Network Utilization
The former HTTP/1 protocol was using more than 1 TCP connections to send and receive for every single request/response pair. It utilized many resources on the web page making different requests for each file. As the overload continued, the server began to process more and more concurrent requests, which further increased the latency.
Solution:
We used HTTP2 to reduce latency in processing browser requests via single TCP connection. Enabling Keep-Alive avoided the need to repeatedly open and close a new connection. It helped reduce server latency by minimizing the number of round trips from sender to receiver. And with parallelized transfers, letting more requests complete more quickly thus improving the load time.
To identify the slow log queries, and requests taking long execution time in the code, we established a proxy connection between Apache web server and PHP-FPM (communicating through modules earlier) to identify the bottlenecks of individual entities by letting them functioning individually. Then we configured PHP-FPM to identify RAM capacity by calculating how many max. parallel connections RAM can handle, leaving the system memory free to process at the same time.
We found inadequate server capacity, while inserting the data in the login and without login scenario to create real-life testing environment.
We proposed a distributed server system so that more than 1 server can be auto generated. We added auto scaling and added 4 servers, but was still burning at the load of 8k users and saw an increased server cost. With Round Robin load balancing, we distributed incoming network traffic or client requests across the group of backend servers. This helped us identify that the load is increasing due to inaccurate working processes of sessions stored in the database.
Bottleneck #5: Session queues
The server was getting overloaded due to accumulating too many sessions when performing load of 10k users login concurrently. And because the sessions were stored in a database, increase in the wait activities decreased the transaction throughput taking session time upto 100s, thus increasing the load on the system.
Solution:
We switched storing sessions from database to Memcache server. It stored sessions and queries in memory/cache instead of files, thus reducing the number of times that the database or API needs to be read while performing operations. It cached the data in the RAM of the different nodes in the cluster, reducing the load in the web server.
Making such scalable and cost-efficient server infrastructure helped the client application achieve the load of 10k users in less than 5 mins using only 2 servers capacity.
The testing process was able to ensure a smooth customer experience and save significant capital expense by maximizing server capacity already in place.
About 100 million people tune into Super Bowl every year. The game is big because the money is big. Companies spend an average of $5 million for a 30 second screen time between plays. Apart from that the Super Bowl generates $300 million in commercial revenues.
With all this money and eyes included, Super Bowl’s 2000s online persona would have been a bad fit for today. Around that time the TV spots were doing great; they were emotional and hitting the right spots, online space on the other hand was the exact opposite. A texty mess.
This blog takes a dive in the website redesign of Super Bowl and helps you draw conclusion in case you’re also asking yourself ‘If I should redesign?’.
Practically speaking, we didn’t have the modular frameworks back then and there was so little to work with. HTML, PHP, CSS, and maybe Flash. In hindsight lack of choices seems better.
Then why even bother doing this unfair comparison, you ask?
Because with this comparison we’ll help you answer a decade old and the most crucial questions of all: Whether you should redesign or not?
Let’s answer this big question with a couple of smaller ones-
What is the end goal with your website?
What are the problem areas?
What will redesign cost?
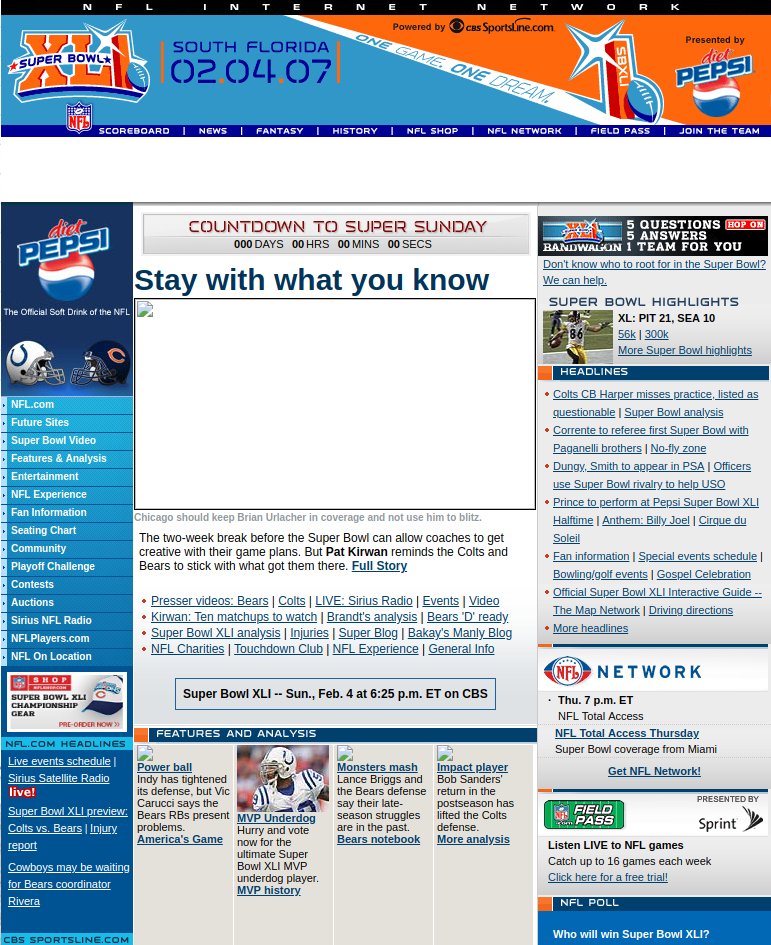
This is a capture of the old Super Bowl website before the redesign. It shows a 3 column layout filled with all sorts of content with no visual hierarchy and respect to white spaces in sight.
The Homepage looks like a headache made out of HTML.
For a dedicated page this homepage sure seemed like a missed opportunity to draw attention towards the primary goal of NFL; getting more people to see the game night. Which brings us to the goal of redesign.
Goal of the redesign
Your reasons for redesign can be purely aesthetic like getting bored of your existing design to something strictly business related; existing design being not good enough for conversions. Rebranding also could be one of the reasons to redesign, when you’re trying to launch a new product or service. Like Super Bowl rebranding their colorful and lively logos for an easy consistent brand image in the form of a new logo post 2010.
Once you’re clear about your goal you can start working on the website or tell the people, who are doing it for you, exactly ‘what you want’.
For the Super Bowl homepage the goal would be to get more people to watch the game, while providing other information like venue and time, all at a glance. Something that doesn’t make the visitor work for little but crucial information.
A picture is worth a thou……
The new design uses the same principal. Just a few days before the game, the homepage features a simple hero image with the game venue cleverly placed in the backdrop.
The new website leverages contrast to make the important information stand out. Like who’s competing, when, and where? There is also a CTA, that clearly mentions what to do next. Being the only action visible before the scroll makes it easier for the readers to complete their journey to the goal.
What are the problem areas?
Like any other website suffering with bad UX, the design team responsible for Super Bowl’s also had to answer questions such as this.
When you’re sure about giving a makeover to your website. Usability reports and insights will help you reaffirm the reasons for your redesign. Having the data-backed reasons to do so won’t hurt.
Ask your agency or hire specialists to evaluate your website, think heuristics, visual QA, and accessibility tests. Knowing exactly what’s wrong helps you gauge the magnitude of the solution, since redesign is not a days job.
So now you’ve figured out the goal of your redesign and the problem areas that you need to work upon. Now all you need is a plan.
How will the redesign work?
Redesign for an enterprise is like clockwork, where all the cogs need to be engineered to fit without fault. Ask these questions to ensure smooth operation of your clockwork:
Is the development in house or outsourced?
It’s not necessary to keep the redesigning in-house if you have a team of your own, since outsourced dedicated teams can produce equivalent or better work more efficiently. When an outsourcing team handles the grunt work, your design team can dedicate their important time for planning how the redesign will go about. If you lack resources, you can completely outsource the design otherwise you can opt for design assistance.
Who leads the overall project and vision?
Inclusion is great for collaboration but it can distract the team from the goal. It is important for your redesign that there is a nay-sayer that keeps the team on track and keeps the project and vision from becoming something else, a hybrid of everyone’s opinion. Just as a Quarterback in football.
How will progress and success be measured?
If there were no yard markings then the football players won’t know if they get another 4-downs or how far they have come on the field. Clearly defined milestones of progress and success will do the same for the team working on your redesign. It prevents constant to and fro later in the process that only results in delays and inconsistent outcomes.
What are your timelines?
Football games typically last for 60 minutes, divided in four quarters of 15 minutes. It helps decide the pace and play of the game. For somewhat same reasons timelines are important for your milestones too. After defining the milestones you’d also need to plan when you’re expecting them. Getting chunks of predefined deliverables in time helps set momentum for project completion.
How much will a redesign cost?
If you manage to find the right agency and all the cogs slide right into place, then you won’t have to worry about the overheads.
A medium to large website redesign can cost around $10000 to $50000 depending on the customization and functionalities you require. Before throwing that kind of money on a redesign project you must ensure that you’re getting a handsome ROI out of the whole exercise.
If you’re thinking that ‘Just doing it’ would fix all your issues then it’s nothing more than a shot in the dark.
Takeaways
Keep Navbar sticky and visible at all times
Avoid multiple CTAs on a single screen
Give content some room to breathe
Make your copy clear and concise
Prioritize content according to your goals
When it’s the right decision, redesigning your website can have a positive impact on your business. But, if it isn’t the right decision, a site redesign can be a huge waste of time and resource.
If not redesign then what? Custom landing pages, targeted ads, and localization are a great place to start.
There are times when the solution to a design problem may “instinctively” pop into your head. Yet, in some scenarios, your instinct might be a valid method in solving design problems.
But, one subjective decision on whether the CTA must be bigger or not, can cost you drop in conversion on the line and ultimately, millions.
Moreover, it’s pretty hard to convince people or your stakeholders when your designs are solely based on intuition. Because they always go in trusting your work with the blindfold half-on and are prepared to point to quantitative data backing-up your hypothesis.
Quantitative user research gives you numbers that you can rely on. Take an example of an online supermarket platform where a lot of decisions are taken w.r.t. the color scheme, UI elements, categorization of products, place of variants option, etc. Quantitative research helps you measure the success and failure of such design aesthetics; you just have to do the leg work.
Take a look at some of the quantitative user research methods and how they can be implemented in your research process.
A/B and Multivariate testing
There is always some disagreement among the designers over the placement of small UI elements. Let your user’s choice be the deciding factor here. Build different variations or versions of your web components or page and present the same to your users. This method will assist you in determining which CTA button is being preferred by your users, or which typography is more appealing to them, and alike.
Their engagement with each experience can be measured and collected in an analytics dashboard and analyzed through a statistical engine with the prior versions. Through comparative testing you can learn which version attracts more clicks or to demonstrate the positive/negative impact of new features or changes to a user experience.
A word of caution: there should only be one difference in all the variants. It will be easy to draw consensus this way and give you definite reasons for selecting one design over the other.
Card sorting
Card sorting is used for structuring your information architecture. It is a cost-effective method as you can provide users with labelled index cards or online card-sorting platforms when conducting remotely. Let them arrange it according to their understanding of topic and ask for debrief later on. Such sessions help participants to do the labelling and categorization as they like.
In an e-commerce website, you can see if under “Packed food items” users are searching for both instant and frozen food items or expecting them in separate categories. Even when you ask them to come up with their own categorization, you can always know how your users group information – are they thinking of nomenclature like “Gourmet Cravings” or looking for simple names like “Food and Beverages”.
Once you have all the data, look for common items, category names or themes, and for groups that were frequently paired together. It helps you organize content so that it suits your users’ mental models, rather than the point of view of your company.
Tree tests
It is a task based analysis wherein you ask users to look for individual elements from the navigation structure that you have built. Tree tests help in improving your navigation by observing how real users navigate your site rather than just going on assumption.
Continuing the e-commerce example, let’s assume you ask the participants to locate “instant noodles”. Your users may go in searching for it under “packed food” category instead of scrolling down to find the “instant food” category. This is how it is often conducted to design page layouts and navigation menus.
It’s the reverse of card sorting. Instead of creating own categories, tree testing asks users to work with an existing set of categories, and highlight where they believe an item is most likely to be located.
Google analytics
Post release, you can use Google Analytics (GA) to see the type of daily users visiting your website. You can compare it with the persona(s) that you have built. You can see where your users are dropping off and what activities they are performing. You can leverage insights on user trends, page with the highest interaction, and how are they navigating.
For instance, in the e-commerce venture, analytics will help you understand your user demographics, type of device they are using, product preferences, how far are they scrolling, et al.
GA makes data visualization easier. There are multiple options to represent your data like line graphs, pie charts and bar graphs, thus making it easy to explain it to all the stakeholders involved. Thus, with the information in capable hands, GA can do wonders for your business.
Back To You..
To achieve your ultimate goal of intuitive and easy-to-use interface, backing your design decisions with data from quantitative research will help you build experiences that are fit and relevant for your target audience in the long run.
Hence, instead of depending solely on subjectivity or qualitative research, design must be validated with quantitative research, and proven design practices, as design exists to solve real problems, which inherently makes it objective.
Your product’s success ultimately boils down to how well you have done the user research. As a UX studio our team is equipped to tackle any UX challenge thrown their way. For any assistance related to user research and analysis, feel free to talk to us.
You’re working happily on your app and all is well, then suddenly – POOF! – it crashes. Aaargh!!
Apparently ‘Crashes decrease with new session the very next day by almost 8x’ (Cue sad violin).
It happens to the best of us.
Stability issues can derail the success of even the best apps. Buggy apps can drive your users away, uninstallations aside, they have the potential to wreck your reputation when users leave one too many distasteful reviews.
Something to bear in mind is that it’s not only about crashes. Users face errors that are not necessarily a crash, so tracking user-facing errors such as error messages and API response times is also important. There are several types of crashes an app can experience- either it can be ANR errors or crashes related to API integrations.
Bug fixing doesn’t need to be hard. You’re likely to worsen the situation if you freak out and start changing things at random, hoping the bug will magically go away.
Instead, you need to take a methodical approach and learn how to reason your way through a crash and maintain app stability.
You can’t fix what you can’t find
The first order of business is to find out where exactly in your code the crash occurred: in which file and on which line.
You do have control over some of the errors and can find them. You can let the user know of the problem via building a communication channel when a user loses their WiFi connection while file transfer is in the process.
When errors are from unexpected app behaviour, your mobile app testing kit will need app monitoring and tracking tools to detect the behaviour that leads to app crashes. There are tools that are not only for mobile apps but also for OTT and Unity as well. In addition, no matter what tool you use, it’s normally an SDK that reports you about the crash alerts.
Even if you are able to collect all this data, it’s difficult to figure out which crashes to troubleshoot and fix first. And this issue follows our next approach to a stable app.
Follow Eisenhower’s Urgent/Important Principle
It’s important to prioritize and sift the problems most users are facing first.
As it’s common that teams tend to tackle bugs on a first come first served basis. Especially if the report comes from a loud voice or a key stakeholder.
This principle comes handy in such a situation which is more like a Rule of Thumb. This principle can tell you to quickly identify the activities that have an outcome that leads to us achieving our goals (Important), and activities that demands immediate attention (Urgent) that you should focus on, and the ones you should ignore.
Basically there are a couple of crashes or bugs that might be causing complaints, solve those first and iterate your priorities accordingly – you will see your crash rate and complaints decrease dramatically.
Practice better Exception Handling
An exception happens when something goes wrong. Tried to open a file but it doesn’t exist? You’ve got an exception. Attempted to call a method on an object but the variable was null? Boom! Exception.
And here comes Exception handling which is an error-handling mechanism. When something goes wrong, an exception is thrown. The exception causes your application to crash, if you do nothing.
For example:
Developers often find themselves in a situation like- Is there a way to avoid an EXC_BAD_ACCESS from crashing an app, and handle an exception gracefully?
To handle the exception that was thrown, you need to catch it. You can do this by using an exception-handling block i.e. by using ‘try block and catch block’.
Proper Memory Management
One of the biggest causes behind app crashes is the lack of memory because not all users possess powerful smartphones and high-end tablets. Whereas, people write code as though only their apps exist.
Taking the similar example from above:
You can also get EXC_BAD_ACCESS (while attempting to access nonexistent memory) because of the usable memory already being assigned to other processes. The unavailability of enough memory will prompt your app to shut down.
How to go on about this?
Do your best to avoid using too much memory and use caching whenever possible.
Find where your app holds the biggest data structures or uses the most amount of data and see if everything is absolutely necessary.
You can profile your app to see if there is any memory leak.
If there is no way to save memory, then prioritize what data/ features to dispense and keep, to save memory when it is already low.
These kinds of crashes become very rare with just a little defense and care in programming, and using “treat warnings as errors”.
While improving app usability, knowing how to deal with dysfunctional apps can be of great help. If you want assistance in development and testing of mobile applications, you can chat with us here.
The client was looking for help to test critical functionalities of its mobile application for which they found a solution in Galaxy’s automation testing.
Our client is a trusted peer-to-peer rental marketplace for buying, selling, and renting almost anything. Our client’s dream is to offer a platform where all goods from cufflinks to computers can be borrowed within minutes. Why? Because we all own something that could be of value to someone else.
And with so many users constantly engaging with their mobile app daily, they needed to be certain that the UI runs smoothly on every device and platform without frustrating the users – which could be achieved through a comprehensive well-written automation testing.
Challenge
The client follows agile methodology in its software development process. This allows them to detect bugs earlier in the cycle, which results in speedy bug fixes. While testing early in the software development life cycle, there are certain tests that need to be repeated.
Such cases, when handled manually, were taking a lot of time and effort. Here, they felt the need to implement test automation that can overcome various challenges and help them improve the quality of the product in less time.
The main challenge for our client was to test major functionalities of their app on Android device. The goal was to complete test execution in a less amount of time. Due to the complexity of the application, it was difficult for them to zero in on the best automation framework for their app. They wanted to adopt an automated testing environment to ensure a highly reliable and secure system, and reduce the cost of future changes to their system. Seeking to adopt an efficient automated testing environment and reduce testing time, the client turned to Galaxy.
Solution
Our client came to us with the aim to develop a scaffolding that is laid to provide an execution environment for the automation test scripts. A framework that could increase test speed and efficiency, improve test accuracy, and minimize test maintenance costs while eliminating the scope for human error.
We needed to automate test cases for user portal of their core application. And for that we decided to solve their mobile test automation challenges and build the automation framework from scratch using open-source frameworks for their hybrid App.
Our testing team identified automation objectives and goals. This is determined through consultation between our client’s testing & development team and our testers. We then identified the test cases for automation based on different test case categories like difficulty to be tested manually, chances of human error, repetition, and data required for testing.
Login Test Scenarios:
Verify if a user will be able to login with a valid username and valid password.
Verify if the ‘Enter’ key of the keyboard is working correctly on the login page.
Verify homepage after login
Renting Flow Test Scenarios:
To click Search icon from the homepage and start searching for the product.
When user starts typing words in text box, it should suggest words that matches typed keyword.
To select date from date-picker/calendar for starting to end date of renting.
To validate that the application supports payment gateway transaction as required by the application.
Ensure that user can access the Checkout Page after adding a product to the cart.
To check the logout session and whether the link or button for logout accessible for all users.
To validate the rest of the test cases like scrolling, navigation, double taps, etc.
Having covered all the crucial scenarios and cases to ensure a smooth user experience, it was time to see how the tests pan out.
Testing the functionality
The client needed a team who can collaborate with them having the knowledge of web testing techniques and the e-commerce domain. We undergo discussion over special considerations of various aspects of project understanding such as business goals, current state of automation, and future roadmap.
To further ensure that the app was performing as expected, we did functional and smoke testing on major features, themes, and structure of the application i.e. from login to logout.
We created a testing framework using Java, Appium, Selenium, TestNG, and Maven. Such approach to select multiple open source tools and combine them with a custom framework helped us leverage a number of benefits:
To reduce the time to create and maintain scripts.
We used data-driven automated testing to separate test procedures from test data, allowing to cover more scenarios with a minimum amount of effort.
We used POM concept, and developed special features that could be reused by all scripts, such as to create automated reports with screenshots for failed case/step, common methods for AppiumDriver (click, wait, etc.).
Integrating testing in development cycle
We integrated the script with Jenkins in the client’s environment in windows machine using the batch command. We configured Jenkins in such a way that smoke tests were first executed for sign in, flow of renting a product (on the same day), verify homepage, and verify rental page. And after the successful completion, functional tests were executed for verifying a renting a product on different days.
Results
Our testing team worked with the client and successfully crafted a testing and development plan tailored to their release cycle and pace of customer demands. We helped the client automate the system installation, smoke testing, functional testing, and system deployment process as well.
How we helped the client to get the best out of their automation testing:
Selected test tools that leverage the best-of-breed approaches.
Completed test execution in a less amount of time.
Updated tests in accordance with changes in the UI and function of the application.
Ensured verification of test results generated by automation testing.
Ensured timely submission of test results to the client.
Ensured that the user’s search experience in the site is of the highest quality.
With effective automation testing, our client managed to reduce time-to-market and launched a bug-free product. In addition, integrating continuous testing in the CI/CD process helped shorten mobile app release cycle and ensured high customer satisfaction. And as we took care of repetitive tasks with less number of resources on-board, we thereby helped in maximizing Return on Investment for our client.
The appeal of WordPress is simplicity. The debate on Gutenberg and Page builders is much more than functionalities. It’s more about ease of use.
In the world of page builders, Gutenberg emerged as a complete paradigm shift for the users. The battle goes on whether the page builders will be replaced by Gutenberg and lose their influence? Or is Gutenberg alienating most of the current user base because of its workflow?
In this blog, we are going to compare WordPress page builder plugins with Gutenberg to help you select an ideal choice that suits your WordPress website requirement.
Live visual editing
If you want to figure out how things would appear without saving the page – through an actual live preview of a page as you edit it – then here is a big turn up you will find in the differences.
Page builder offers the level of visual editing that Gutenberg doesn’t. A page builder lets you design the entire page in a WYSIWYG interface. You can save the preview time by making direct changes in the layout and style of the web page.
Styles and themes compatibility
Page builders provide more style options in comparison to Gutenberg editor. Elementor and Divi Builders are among the perfect examples for it.
For a button, Page builder offers a lot of customizations like color, border radius, animations, filters etc. But Guntenberg will only have few choices in its bag like shape, background color, and text color.
Gutenberg relies on WordPress for themes and styles. With custom CSS, you can customize your blocks but the overall look of the page will be the same as your theme. On the other hand, Page builder lets you override themes and styles. Thus help in creating a unique experience for standalone landing pages.
Responsive design controls
Gutenberg does not have a responsive design control. But plugin like Kadence blocks adds custom blocks to extend Gutenberg’s editing capabilities. You will be able to better control columns for different screen sizes and will be responsive according to your theme.
But you can’t change how that responsive design will work in Gutenberg.
Whereas page builders provide responsive design control for each element. Therefore, if you want to have full control on the design, you must prefer page builders as an ideal option.
Layout functionality
You can’t customize margins and paddings for individual blocks in WordPress’ new default editor. It gives some basic options for alignment such as left, right, and centre. On the other hand, a page builder gives you the option to edit every single entity on the screen like margins and paddings.
Gutenberg has some third party extensions to let you use drag and drop options to adjust different layouts for different devices. One of the most popular extensions is Kadence blocks. It adds detailed layouts in a web page. But Gutenberg’s default column block is limited and cannot be compared to page builders.
It’s for this reason, you will always require a page builder to get full layout control.
Scope
Gutenberg comes with limited actions. Ease of use is the main goal of Gutenberg. It is intended to be used by writers, bloggers, and businesses.
Whereas, Page builders work well for people who rely on customizations for their development needs.
Page builders are commonly used by eCommerce stores, WordPress agencies, aspiring designers, small businesses, among others.
Takeaways
Gutenberg is for people who put reliability and ease-of-use over a buffet of customizations.
You can prefer Page builder when you have specific vision for site’s design. You can create unique designs according to your needs and preferences.
You can use Page builders when you want to add some specific features that are not present in Block editor. Some of these features include media carousels and subscription forms.
People who are used to the freedom of customizations in page builders will find the simplicity of gutenberg quite limiting.
Currently, Gutenberg is not powerful enough to replace highly flexible page builder plugins. It’s just a modern version of the classic editor. But there’s a good news Gutenberg enthusiasts…
Integrating page builder plugins within Gutenberg has the potential to bring out the best of both worlds. Maybe WordPress is heading that way only with custom fields integration.
As a result, you’ll be able to use different modules as separate blocks in Gutenberg editor itself. It would help you to create rich and more flexible web experience. At the same time a future with a win-win situation for all.
When you’re looking to outsource, you probably spend a lot of the project’s time in finding that “right partner”.
What if we tell you that even after choosing the right partner the performance rate for software outsourcing remains below 50%. It means that companies who outsource without considering the risks and operation costs, only get half the efficiency out of their outsourcing efforts.
Companies are so quick to handoff their work to off-shore agencies that outsourcing becomes purely transactional. Maybe we can rethink of outsourcing as a holistic approach and start with evaluating our processes and current performance instead of diving straight into a partner hunt and handing off the work to them.
The key is to have an extensive plan so that the risks are low and success rates are high. The rule of 5 P’s sums it up really good-
Proper Planning Prevents Poor Performance
With this guide you’ll be able to strategize for efficient outsourcing, choose the right vendor, optimize testing costs, and streamline your development process with QA.
Getting ready for outsourcing
Define Objectives and Goals
Clearly defined objectives and measurable goals makes for a good basis of an outsourcing strategy. Objectives will help you with decisions concerning a project’s business value, vendor, outsourcing models, projects to outsource, and related risks to assume. Down the line objectives will also help you evaluate the success/failure of your strategy.
Whereas, Goals are the events and functional metrics by which management can monitor progress, take corrective action, and project future performance.
Measure Performance Baseline
You’ll also need to define metrics with which you can represent a baseline performance for your outsourcing efforts. Use these metrics to get a baseline for your current performance which can be later referenced for future measurements. Baseline also clarifies which metrics are important in achieving specific goals and business objectives.
Set realistic expectations
After defining your goals and expectations, you need to check if they’re are just. Unrealistic expectations of large immediate savings is the reason behind most of the failed projects.
Practical expectations ensure stability for your offshore strategy. A careful analysis for ROIs and timing of the benefits will help you evaluate and set better expectations.
How to choose and manage an Outsourcing vendor?
Shortlist a vendor –
A quick Google search will land you on the pages of thousands of vendors with a fair amount of happy client testimonials. How do you see past a few deliberately filtered out success stories? The first thing in your course of action should be checking the review and references of your shortlisted vendors.
A vendor with a good track record should be able to provide you with sufficient references. References might give you just enough green flags to go ahead in your research. You can then continue your vendor evaluation based on the below mentioned factors.
Gauge their expertise
To showcase one’s expertise vendors should provide you with their test documentation, portfolio, and test cases. The depth of their reports should give you a good idea about their process and cases they cover.
See if they have sufficient resources and services
An ideal vendor should always have more resources than you need at the moment. Regardless of your immediate needs, your vendor should be able to do all types of testing be it automated and manual for web or functional, performance, usability, compatibility, API, and security testing for mobile/desktop. It enables your vendor to scale as you do.
Vendor management and assessment –
Understand your vendor
Vendor management starts from understanding their needs and where they are coming from. An outsourcing vendor has to deal with operational costs, talent acquisition challenges, and problems with other projects. Excessive price negotiations might push them to cut corners by allocating insufficient or junior resources.
Regularly assess the vendor
Regular assessment ensures quality. You need to have a systematic assessment in place, so that when you’re unable to get the expected quality of work, you can take action or look for other vendors.
Make sure that the frequency of these tests is not on the higher side, because it will shift their focus on showing rather than actually doing things. Assessing too frequently will keep them on the edge all the time.
This assessment criteria should get you started.
– Number of missed bug
– Quality of defect description
– Correlation between testing efforts and outcomes
– Quality of test documentation
– Capacity and availability of resources
– Efficiency of testing tools
Manage vendor performance
Assessment provides you with insight that you can use to improve the testing procedures in place and maybe introduce some measures to increase the efficiency.
You should review vendor’s testing documentation at least once a month. Based on the reviews, your QA lead should provide the test team with relevant feedback, detect hidden wasteful steps and cost drivers.
You should also be in constant touch with your vendor’s QA manager to communicate missed bugs or unclear reporting. Ensure that the test team properly understands business and software requirements.
In case a vendor fails to deliver on your expectations, you can consider a multi-vendor strategy. For big enough projects you can assign different part of projects to different vendors. Having options makes the replacement easier when and if your projects are at risk.
Dealing with cooperation issues –
Prioritize testing activities
Addressing urgent issues is a common practice in an agile environment but urgent requirements can often delay the important issues. Because, every time there is a change in requirement vendors need to adapt and reprioritize. While dealing with the changes they might leave business critical or problematic features out of the scope.
Your QA manager should be able to help the test team create a clear test plan and prioritize testing activities, so that nothing is swept under the rug.
Include several SLAs in your contract
Since it’s difficult to match a traditional contract with a flexible agile testing process, you can divide your contract into several service level agreements(SLA) to make collaboration more manageable. Each SLA should cover a part of the services to be rendered, the time required for execution, priority, and KPIs.
Which Outsourcing Model to choose?
An outsourcing model has many variables, such as scope, distribution of responsibility, contractual flexibility, and duration, but the main variables that define a model are the distribution of responsibility between you and offshore vendor, and the scope of the outsourcing effort.
Staff augmentation
This model has the same characteristics as a traditional onshore staff-augmentation model. You hire contractors to perform a particular task or role. The contractor receives work assignments directly from your company, the same as all other developers on the team, and performs the work remotely.
However, the staff-augmentation model has the advantage of having the lowest risk and being the easiest to implement as it can be executed with a single offshore resource for a fixed task and duration.
Offshore vendors tend to shy away from this model and many strongly discourage its use due to the shared overhead costs and limited upside for the vendor.
Project-outsourcing
This model is a self-contained engagement with fixed start and end milestones where a dedicated offshore team is responsible for delivering a complete project according to your specifications.
If you have a large project, you can start with a pilot project by assigning an isolated part of the project to see if the vendor’s processes are mature and what are the overhead costs and vendor also learns how your company functions.
If the project is small, the risk is relatively contained and both parties figure out the intricacies of an effective business relationship.
This model is more appealing to many offshore vendors and represents a more significant benefit for both your company and the vendor because the model can be scaled up to more and larger projects.
Dedicated development centre
In this model the vendor has a pool of resources, resources that are dedicated to your company’s use.
As your company matures in its relationship with an offshore vendor, this is a logical next step in growing from either a staff-augmentation model or a project-outsourcing model.
This model allows the same resources to be retained for multiple successive projects and reduces the loss of intellectual capital prevalent with the project-outsourcing model.
Functional outsourcing
This model outsources an entire business function, process, application, or department. This tends to be a high-risk, high-reward endeavor.
You must be confident in your vendor’s ability to deliver significant business value and minimize the risks of business disruption before entering into this kind of relationship.
However, offshore vendors that specialize in a certain business functional area can often provide a higher level of expertise than you can — at a reduced cost.
Tests to look for
An experienced outsourcing vendor with structured QA processes will help you realize robust and reliable products in shorter turnaround time. With their proven industry experience they will also ensure consistent implementation of best practices.
Knowing their process can prove to be an insightful experience into their work and how they operate.
Just to give you an example here’s our process that explains how a product is tested, starting from an atomic level (lines of code) to a molecular level(modules) to an elemental level(System).
Unit testing-
This stage focuses on a small piece of an application, even something as granular as a line of code like a method or class, and ensures that it functions as per expectations.
Our Unit testing checklist
Write a line of code
Write a method to test that code
Implement the code
Launch test
Verify results
Unit testing accelerates productivity by streamlining development and lowering the risk of time-consuming and costly bugs down the line.
Integration testing-
Units make up a module and if units do what they are supposed to then it’s time to see how they work together as a module in integration testing.
Here are some methods used in integration testing:
Big bang
Top-down
Bottom-up
Sandwich/hybrid
Integration testing verifies the functionality, reliability, and interoperability of multiple system components working together. It also identifies and addresses problems with exception handling.
System testing-
Software system testing looks at a software product as a whole and evaluates whether it successfully meets the pre-defined functionality, end-user, and business criteria.
Functionality
Does the system function as the requirements criteria detail it should?
Performance
Is the software reliable, responsive, stable, and performant under various conditions?
Regressions
Has the software retained its original functionality since its modifications?
Usability
Is the software user-friendly, and intuitive? Does it offer an optimal experience for the end-user?
Stress
Can the software hold up as the load and stress on the system increase?
Load
How quickly does the system respond under normal and peak conditions?
Security
Do the security features ensure the integrity of the software product as far as protecting sensitive data and information are concerned?
Recovery
Can the software recover successfully and quickly following a crash or failure?
Interoperability
Can the software successfully interact with other software systems or components?
Documentation
Are all test scenarios and requirements agreed upon prior to and during this QA phase well-documented?
If bugs, breaks, or defects are identified during this stage of evaluation, they are fixed and then re-tested, forming a repeated quality assurance cycle until the software QA team signs off for deployment.
System testing ensures end-to-end evaluation of an entire product prior to release and lowers risk for application failures once the product is live.
Acceptance testing-
Even after all the programming, technical oversight, quality assurance, and bug fixing, software acceptance testing is necessary to evaluate that the end product fulfills the purpose for which it was originally designed and developed.
Acceptance testing mitigates any fallout from outstanding bugs or defects that weren’t identified in the previous unit, integration, or system examinations. It also improves overall user experience as testers and users relay usability and functionality feedback
The above mentioned testing process is common to all software development and testing providers. But to ensure utmost product quality and robustness we have these additional layer of tests that help us make our products flawless.
Load or performance testing on page and application scale
Security testing
Accessibility testing
Visual QA
Automation testing
Key takeaways
Software testing and QA outsourcing is an opportunity for businesses to reduce IT overheads and improve efficiency.
Good software testing is a specialized and professional skill, and not merely an afterthought entertained at the end of the IT project life-cycle.
Even if large-scale offshore outsourcing is not an option that you’re ready to consider, outsourcing a small part of a large project can provide an effective supplement to your existing solution.
Ultimately QA outsourcing boils down to understanding your needs, setting cautious expectations, and knowing when to withdraw.
The pursuit for finding the perfect “javascript framework” can seem like a wild goose chase. But it never is. There are one too many frameworks and each one has traits that makes choosing more difficult.
Whether you’re trying to get into frontend or shifting from PHP or C++ to Javascript, these comparison points between Vue and React are just the thing to get your started.
Popularity
Javascript is quick in releasing frameworks and libraries. The only constant thing is the continuous change in the top positions of the frameworks and libraries.
According to the trends Vue might not seem like a go-to choice of people.
But GitHub stars tell a different story altogether. In June this year VueJS surpassed React. And Vue is still in the lead with 152k stars in comparison to React’s 140k stars.
A point to be noted is that Vue has lesser number of commits and contributors. A possible explanation is that Vue is driven by the open source community where as React has Facebook’s employees as its contributors.
Community support
Facebook’s backing to React signifies strong community support. Till date, React has 171k questions on StackOverflow in comparison to Vue’s 44k questions. But React’s community is more fragmented than Vue’s. This makes it difficult to find answers to even common issues and roadblocks. But Vue gained immense popularity and support from the developers. Vue has successfully created its own name without any major brand’s backing.
Learning curve
Developing your website via React will require you to have a huge knowledge of third party libraries as React is a library and not a framework. Whereas Vue has tools like Vue CLI 3 and Vue UI which will help you in building MVPs real quick. Vue is considered to be more developer friendly due to it’s short learning curve. Also Vue has taken inspiration from Angular and React which makes the transition easier for developers.
Performance
Performance can be measured on various aspects. Measuring it on the basis of framework’s size, Vue has a smaller framework size in comparison with React. Vue’s framework size is of 80KB whereas React is of 100KB. This will have an impact on the initial load time as well.
Virtual DOM is used by both React and Vue. But Vue has better performance and memory allocation due to its well built structure. A word of caution, the final performance will also depend on your application size and how well your code is optimized.
Documentation
Vue’s development team has put in a lot of effort in the tool’s documentation. The API reference is said to be the best in the industry. There is a detailed overview of Vue’s ecosystem, which is absent in React’s documentation. All the information required for creating Vue’s applications is well-written and accessible with ease. All this goes in Vue’s favour. React’s documentation includes basics and some advanced concepts, however it fails to present it in an easily accessible manner.
Use cases
Vue and React are both used by known global names for their websites and applications. Behance, Louis Vuitton and LiveStorm have used Vue. And Airbnb, Netflix and PayPal have selected React. The list is long for both. Vue is scalable and gets integrated easily, so it can be used for bigger development projects as well. However, using React for smaller projects is not a smart decision according to industry experts.
So, When to select one over the other?
If you are a fan of:
Flexibility
Experimenting with lots of libraries and tools
Large community support
Javascript more than HTML
React will be your go to option.
If you are someone who:
Is looking for short learning curve
Likes clean code
Wants a lightweight framework
Need an MVP on short notice
Vue should be your go to option.
The battle for choosing the ‘best suited’ framework depends upon your specific requirements. And your requirements will change over the course of time. Be prepared for that change as well.
No software is perfect, just like humans. But the pursuit of perfection is not futile.
If you look around the web you’ll find thousands, maybe millions of posts telling you how to code, improve performance & stability, scale, and secure your applications. What you might not find is a comprehensive guide that has all the aspects that are needed for a robust mobile application.
In this blog you’ll get to learn about the best practices from design pattern and server setup to coding and security.
Design
Designing is the most crucial stage in an applications development life cycle. Conversions rely heavily on designs and how they’re implemented. Here are some of the best practices that can make your app a usability treat.
Create efficient onboarding: The goal of onboarding is to show the value of your app to the user by demonstrating how they can achieve what they want in a quick and efficient way. If the user is having trouble within the first few screens, they’ll likely drop off without hesitation.
Improve usability: Help your users by telling them which icons can be selected, tapped, or swiped. Ensure that you remain consistent with gestures throughout the app to optimize usability, e.g., if swiping up deletes an item, make sure that the same is true for all screens within the app.
Prioritize actions: For each screen, there should be a primary action. This results in an easy-to-learn interface. You can show prioritization with contrasting colors, different fonts, or buttons.
Construct a navigation that’s easy and apparent: But, how do I do this? Here are a few points that we follow during our development :
Don’t hide it — the more obvious it is, the better. Never make a user hunt for it.
Deliver consistent navigation throughout the app. If you hide it on internal pages, you’ll only add confusion.
Indicate to users where they are by highlighting their location. This can be a problem for apps as users become “lost” and may abandon the task.
Utilize a standard navigation platform. For iOS, “Tab Bar” is a good option, while Android works well with “Navigation Drawer.” Stick to simple — it will help you more than spending time on clever.
Scalability
An app that isn’t designed and developed to seamlessly handle continuous growth will eventually end up being a failure. Hence here are some scalability best practices that ensure your app holds up as your business grows.
Choose the right architecture that way the app can grow organically with increasing traffic to the user base. Based on your needs you can go for MVVM, MVP or MVC pattern.
When it comes to the server side, it must use “Auto Scaling” so that the server can perform well when the user base grows.
Try goingstateless: Keep APIs stateless. In each request, the client should provide all the information which would be required to fulfill that request. This might not be possible in all cases. Sometimes, we might have to query our database and other services. But try to follow as much as possible.
Security
We know that security is key to putting web/app users’ minds at ease as well as your own! There are six essential security elements that will protect users’ information. If one of these six elements is omitted, then the information is at risk.
Availability refers to how you’re able to access information or resources in a particular location as well as in the right format. When a system isn’t functioning properly, information and data availability is compromised and it will affect the users.
Utility isn’t always considered as a pillar in information security, but let’s say that you encrypt one copy of some important information and then the encryption key is accidentally deleted. The information would be available — it just wouldn’t be accessible or usable.
Integrity references methods of guaranteeing that the data is real, accurate, and protected from any changes from an unauthorized user.
Authenticity aka “authentication” makes certain that the user’s identity is validated.
Confidentiality allows authorized users to access sensitive and protected information. Sensitive information and data needs to be disclosed to only authorized users.
Nonrepudiation is a method of ensuring that message transmissions between parties have a digital signature and/or encryption. A data hash will help you acquire proof of authentic data and data origination.
Cloud and DevOps
Now that almost every app is on cloud with user bases exceeding millions on an average, it is business-critical to have a proper cloud infrastructure and DevOps in place. Here are some practices related to the same.
Create isolated environment with the help of VPC (virtual private cloud) and define subnet on GCP (Google Cloud Platform) .
Using IAM(Identity and Access management) services is handy to provide role-based access to any external users.
For database services, we recommend using cloud SQL.
For some of our clients, we have used Kubernetes engine for container based hosting.
Use Continuous Integration (CI) and continuous Delivery/Deployment (CD) to make deployment strategy automatic.
Using GCP Firewall for server security.
Configure server environment with auto scaling.
For email servicing, being experienced in configuring G-Suite will help.
Use multi-region, load balancer on GCP to route the traffic region wise.
Testing and Optimization
Testing is crucial for a successful project as it enables developers to reveal performance gaps at early stages preventing any development overheads. Based on the identified performance gaps the app can optimized for quality and stability.
Apply profiling tools for monitoring: Use tools like X-code profiler and Android profiler. With the help of profiling tools, you can detect the crashes and, thereby, get an alternate code against the same instantly.
Test the app on multiple devices in order to make sure it performs well on most popular devices.
Prepare for varying network speeds: A mobile user would mostly be using the app on the go, so make sure the app works well in case of switching from WIFI to mobile data or vice versa.
Optimize queries:
By optimizing queries, you can control output at the first end, which helps to prevent use of looping, reduce the number of statements, and the excessive use of other controls on the code end. This results in optimal performance for your site.
Optimizing will create database normalization rules.
Monitoring and Maintenance
Contemporary applications are accessed from different platforms like phones, tablets and desktops. These platforms come with different operating systems, software/hardware platforms, security setups and other limitations. Therefore, continuous application performance monitoring is an essential part for smooth operations.
Load testing: Check performance of the site with speed test tools, such as GTmetrix, pagespeedtest.org, etc., and implement its suggestions
Use crash reporting: We recommend integrating a crash reporting tool, such as Fabric Crashlytics
Make use of short statements — fragmentation of a big function to reduce the same code across multiple places
Maintain error logs: This helps keep you organized
Write rules to send email notification to developers/responsible person in case of any issue/error occurs.
Combining the above best practices will help you deliver a site/app above the rest
If the above seems like it’s overwhelming to handle or even for your team to handle alone, reach out to us and we’d be happy to help you in all things related to optimizing your site or app.
Galaxy Weblinks has a dedicated team of designers and developers that are well-versed in creating efficient websites and mobile apps, so reach out to us a