Is WordPress 5.0 Following the Craft CMS Path with Gutenberg?

In today’s digital era, where websites have become the lifeline of businesses and bloggers alike, the choice of a Content Management System (CMS) can make or break your online presence. WordPress, known for its user-friendliness and extensive plugin library, has been a go-to choice for many. However, the release of WordPress 5.0 with the Gutenberg Editor raised questions and comparisons with another rising star in the CMS world – Craft CMS.

A Shift in the WordPress Landscape

The WordPress landscape, which has been evolving consistently, took a significant turn with the introduction of WordPress 5.0 and the Gutenberg Editor. WordPress powers over 43% of all websites on the internet. That’s a staggering number, showcasing its dominance in the CMS world However, the Gutenberg Editor brought a new way of content creation to WordPress users. It aimed to simplify the process with a block-based approach, allowing users to build and customize content with ease. While this change was intended to make content creation more intuitive, it raised concerns among the WordPress community.

Craft CMS: A Rising Challenger

On the other side of the spectrum, Craft CMS has been gaining traction for its flexibility and developer-friendly features. Craft CMS offers a blank canvas for developers to create highly customized websites, making it a compelling choice for businesses and developers who require precise control over their websites.

Real-World Example

To illustrate this shift, consider the case of Jane, a small business owner running an online boutique clothing store. She had been using WordPress for years, enjoying its ease of use. However, when Gutenberg Editor was introduced, her routine changed. Initially intrigued by the block-based approach for showcasing her clothing products, Jane faced a learning curve, leading to a temporary decrease in productivity. She had to invest hours in understanding the new system, affecting her ability to focus on her business. Now, let’s look into the case of Mark, a blogger using Craft CMS for his technology blog. Mark appreciated Craft CMS for its developer-friendly approach and precise control over website design and functionality. The transition to Craft CMS was seamless for Mark, allowing him to continue publishing tech articles without interruption. His blogging experience remained smooth and uninterrupted.

The Numbers Speak

Now, let’s explore some numbers to better understand this shift. WordPress 5.0 adoption faced initial challenges, with some users hesitating to upgrade due to concerns about compatibility and workflow disruptions. On the other hand, Craft CMS witnessed a steady rise in popularity, particularly among developers looking for a more robust platform.

Craft CMS and WordPress Adoption Rates

  • WordPress, as mentioned earlier, continues to dominate the CMS market with a staggering 43% market share.
  • Craft CMS, although not as widely adopted as WordPress, has been growing steadily and is becoming increasingly popular among developers and businesses.

Simplifying the Decision-Making Process

So, what should you choose for your website? In the end, everything comes down to your own requirements. Let’s break down the decision-making process further:

WordPress 5.0:

Pros:

  • Vast Community: WordPress boasts a massive community of users and developers, resulting in extensive plugin support and resources.
  • Simplicity: WordPress is known for its user-friendly interface, making it accessible to beginners.
  • Ecosystem: It offers a wide range of themes, plugins, and integrations.

Cons:

  • Learning Curve: The transition to Gutenberg may require some users to adapt to a new way of content creation.
  • Customization Limitations: While WordPress is highly customizable, Craft CMS offers more granular control over design and functionality.

Craft CMS:

Pros:

  • Flexibility: Craft CMS provides a blank canvas for developers, allowing for precise customization and control.
  • Developer-Friendly: Developers appreciate Craft CMS for its coding flexibility and robust features.
  • Performance: Craft CMS is known for its speed and performance, ideal for high-traffic websites.

Cons:

  • Smaller Community: Craft CMS has a smaller community compared to WordPress, resulting in fewer plugins and themes.

Your CMS Partner

In the world of CMS, one size doesn’t fit all. Whether you lean towards WordPress, Craft CMS, or any other platform, what matters most is choosing a solution that aligns with your goals. At Galaxy Weblinks, we understand the nuances of WordPress, Craft CMS, and various other CMS options. We offer comprehensive CMS services, including WordPress Web Development and Craft CMS solutions, tailored to your unique requirements. Partner with us to navigate the CMS landscape effectively and make the right choice for your digital journey.

Angular 7 upgrade | What will you miss if you ignore?

Angular 6, released earlier in May 2018 didn’t offer much improvements on the performance part. It was mainly focused on making Angular migration-friendly. Google dropped Angular 7 just after four months of development and it seems to make up for that part of the framework.

The upgrade was released on October 18 followed by an incremental update 7.1 on November 28.

Angular 7 version upgrade is not a feature-intense update, instead it focuses on the core framework. As a result you get better performing applications with small packages and faster response.

The long-due Ivy compiler is still under works but other things were delivered as promised.

CLI prompts

Angular CLI can prompt users to help them make decisions. ng new prompts users of routes and styles to use, while ng add @angular/material asks users what theme they want and if they want gestures or animations.

Performance

Application performance has been improved by automatically adding or removing the reflect metadata polyfill, making applications smaller in production.

Angular Material and CDK (Component Dev Kit)

Angular 7 features virtual scrolling, for dynamically loading and unloading items from DOM according to the visible parts of the lists. Also, applications can be fitted with a drag-and-drop capability. Angular Elements components now support content projection via slots.

Why Angular 7?

Why not when it offers brilliant perks like these.

  • Comes with better mobile and desktop application support.
  • Application packages are smaller and efficient.
  • CLI prompts help you make decisions and code faster.
  • Angular 7 now features budget bundle. It warns when application exceeds the default size
  • Fast rendering of large lists with virtual scrolling
  • Upgrade takes less than 10 minutes for most of the apps.

Things that were further improved with the latest incremental update Angular 7.1

  • A bug fix to the Ivy compiler so it now can generate inputs and aliases properly. The compiler had been generating an outdated input property format.
  • Also in the compiler, a bug fix generates a relative path only in summary file errors.
  • Previously, errors in the summary file included absolute file names.
  • The compiler now can mark an InvokeFunctionExpr as pure.
  • For the core of the framework, a static dependency to @angular/compiler has been removed from @angular/core.
  • A regression in the router has been fixed in which the navigateByUrl promise did not resolve on CanLoad failure.
  • For service workers, typing has been added to the public API guard and lint errors have been fixed.

Planning an Angular 7 upgrade? Mind these prerequisites.

For apps that are running on Angular 6 & RxJS 6 use this command:

$ ng update @angular/cli @angular/core

And for the apps running Angular Material

$ ng update @angular/material

Upgrading Angular is a hassle-free process but more often than not version upgrades can mess your app’s current state. Upgrade failures are universal for every software so it is highly advised that you perform the upgrade with the help of an Angular expert. Speaking of which, you can get in touch with us.

Craft & its Plugins | A transforming workflow

We like to think of Craft CMS as a Transformer (one with BumbleBee as his friend) and plugins as its Jet Pack. And every time we develop a plugin for Craft, it helps our Craft projects reach client’s expectations. Craft is a powerful CMS and its developers have left a lot of scope for extensibility. Plugins do the things that Craft CMS cannot. In our workflow Craft plugins help us do more than what Craft can do. Often our clients steer clear of plugin development because of the extra work and vulnerabilities it brings. That’s not the case with Craft plugins. You can read about plugin vulnerabilities in our Craft Vs WordPress blog. Before diving into our plugin development workflow you should know about Composer and Pluginfactory. Craft CMS 3 is highly dependent on the Composer for its development. Composer is a PHP package manager that helps Craft with PHP dependencies. Pluginfactory on the other hand is a different tool altogether it creates scaffolding for plugins. We use the scaffolding to configure our code in it. After defining the need we get on to the business of building the plugins. Craft documentation has a pretty straightforward approach to plugin development. Being big fans of Craft’s coding techniques we looked no further for inspiration. Our plugin development process is as simple as Craft’s.

Building “The Jet Pack” for Craft CMS

Image credit: pixabay

Nomenclature for the assembly

Like the parts of a Jet Pack, parts of the plugin should be named in a consistent format so that they can be identified easily. We follow the naming guidelines whether we’re naming packages or handles. It is safe and efficient to follow a particular nomenclature.

According to the Craft’s documentation-

  • Plugin handle must have lowercase letters, numbers, and dashes. All in Kebab case
  • Package name should have Craft- prefixed to it, after the ‘/’

Creating blueprint for “The Jet Pack”

Image credit: matej

Before we found out about pluginfactory, like every other developer we used to make our plugin structure manually. Pluginfactory creates a skeleton for your plugin in just a few clicks. It is created by a Craft developer named Andrew Welch. The scaffolding on pluginfactory are made using the Yeoman generator.

Details needed to create the scaffolding

  • API version
  • Plugin name
  • Description
  • Initial version
  • Plugin vendor
  • Plugin author
  • Author URL
  • Github name
When the structure is ready we feed our code into it and voila! Our plugin is ready.

Installing “The Jet Pack”

Image credit: jaguarmena

Plugins are written as composer packages. For Craft to recognize the plugin we have to install it as a composer dependency of the project. The installation depends on the nature of plugin whether it’s local or public. If it’s local we install it by configuring the composer.json and adding a new path repository record. The path must point toward the plugin’s root. If a plugin is made for a public release then it can also be installed directly via composer. After registering the plugin as a new composer package on Packagist, a require package command in composer fetches the package and installs it.

Final word: Plugins are essential

Image credit: jaguarmena

Plugins are not a crucial part of a CMS but it sure is important to achieve something out of the box based on client’s requirement. We find plugins to be extremely powerful and time-saving. The most important function of a plugin is to eliminate tedious and repetitive tasks by automating it. Some examples might put its importance into perspective.
  • SEO plugins make search engine optimization easier
  • E-commerce plugins improve customer journey.
  • Analytic plugins help with insights on page performance
  • Text and image editor plugins provide rich editing functionalities
If you’re looking to transform your Craft CMS experience — visual or performance — then plugins can help. As for the development of the plugin, talk to us here.

Drupal 8.6 update. What’s new?

Keeping up with the promises made during earlier announcements, Drupal released the 8.6 version on September 5. The update comes with significant additions.

Drupal 8.6 now supports MySQL 8. Also, with this update a monolingual Drupal 6 site can be migrated to Drupal 8 directly from the user interface. Multilingual website migration using the UI is still under development. Apart from these changes, other important changes are listed below.

Easier Drupal installations

Installations on Drupal have been made easier. There are two ways to install Drupal.

  1. A quick start command installs Drupal within 2 minutes using PHP’s built in web server and SQlite database.
  2. Drupal’s installer now recognizes existing configurations and provides an option to install updates for that configuration.

Test environment to showcase features

Image source: drupal.org

Drupal now provides an easy-to-install test environment in a demo website called umami. The demo profile can be used to showcase Drupal’s data modeling, listing, page composition, and content moderation capabilities to prospects. It will also help in onboarding new users.

Support for remote media types

Image source: drupal.org

This Drupal update adds support for remote media types. You can now easily embed YouTube and Vimeo videos.

Experimental features

Image source: drupal.org

Workspace module and layout builder are some of the experimental features that are introduced with this update.

Workspace module lets you work on different projects simultaneously. You can segregate your projects using workspaces.

Content layout builder is an under-development experimental version. The stable version will be a powerful tool against authoring challenges.

Drupal 8.6 update package brings some much-needed additions to the table, such as:

  • Nightwatch.js and Prettier is added to make it more familiar to Javascript and PHP developers.
  • Tests are converted from SimpleTest to PHPUnit.

Whereas, JSON API was skipped in this update.

Any updates, whether it’s incremental or critical, means a mandatory upgrade for the older versions. Drupal will end support for Drupal 6 but support for Drupal 7 will continue.

Upgrade to Drupal 8.6 now.

Get in touch with our Drupal experts here!

Magento 1 End Of Life: It’s time to migrate to Magento 2

Magento announced that it is pulling the plug on Magento 1 in April 2017 at the ‘Meet Magento’ conference in Prague. The announcement caused a frenzy amongst developers and business owners. However, Magento later cancelled the End of Life and announced an 18-month notification policy for the EOL date. Even though the End of Life has been delayed, it’s high time you start planning Migration to Magento 2. Magento’s team will provide support for Magento 1.13.x and 1.14.x Enterprise editions, but only till June 2020. The support for Magento 1 community edition is no longer available. End of support on Magento 1 means that there will be no further development. With no security patches, your business and data will be at risk. This would leave your website vulnerable to hackers. Apart from security you might also face the following issues if you decide to delay the upgrade:
  • Increased maintenance costs
  • Lack of support for extensions
  • PCI compliance issues
  • Lack of speed (Magento 2 is faster)
Magento has provided you with the timeframe to understand the database, compatibility, and integration needs for a smooth migration and upgrade. As most of the current Magento websites are running on Magento 1, the users currently have two options:
  • Start planning the migration to Magento 2
  • Stick with Magento 1 for a while till a glitch makes it urgent.
Moving to Magento 2 will change your website’s game. It easily handles huge traffic and aids faster checkouts. As per previews, the stores in Magento 2 load 30–50% faster than Magento 1. Magento 2 solves the problem of slow page loading speeds and checkouts, resulting in lesser transaction failures and more business! As Magento 2 is based on a different architecture, the migration will be a time-taking process. It is highly advised to get a team of Magento experts on board and get on with it. Bottomline, GET IT DONE NOW! DO NOT PUT THE UPGRADE ON PENDING TASK LIST! Migration to Magento 2 is a walk in the park if you have right development partners onboard. Get a Magento expert here!

ACF vs Visual Composer website builder: Which is better?

Building a WordPress website? The WordPress community provides you with plenty of options. You can either make an easy one using WordPress themes or a custom one using website builders. A website builder is the most convenient way to make a personalised website. WordPress community provides you with a ton of free and paid builders as per your needs and levels of expertise. Once you make up your mind on what you plan to do with your website, then you can chalk-out the structure and the elements that you’re going to need for the website to function. After locking in your requirements, you can choose your website builder. We recommend using two of our recent favorites.
  • ACF
  • Visual Composer

ACF

Image Source: advancedcustomfields.com

The interface of the Advanced Custom Fields is simple. It lets you create dynamic fields for individual elements of your website. Installation and activation of ACF adds Custom Fields to your WordPress dashboard. From the Custom Fields menu you can take full control of your edit screen & custom field data. The minimalistic interface of ACF can be mistaken for an under equipped website builder. You can make some of the most complex and powerful websites with ACF. The best thing about ACF’s interface is that it doesn’t try to overwhelm you. It only shows the functions that you need. ACF gives you the full control of your website right from header to footer. You can build individual elements of your website with custom fields. There are 25+ different field types to choose from, vis-a-vis. text, image, gallery and WYSIWYG editor. These fields are dynamic. You can use them to give your client an easy way to update their website according to their liking.

Visual Composer

Image Source: visualcomposer.io

It has a clean and modern interface which allows you to make basic layouts with ease. The interface lets you work on different elements of the website, right then and there. Visual Composer has a floating window which pops up every time you’re trying to add or edit an element. The window is movable and resizable, you can place it anywhere if it’s obstructing your view. Visual Composer gives you the best of both worlds with its backend and frontend editor. While building, you can easily choose from the ready-made layouts of landing page, call to action page, feature list, description page, service list or a product page. Adding elements in the website is also easy with the element window. The drag and drop visuals come at a cost of short codes. Migrating to another website builder or uninstalling Visual Composer leaves short codes in the content, rendering it unreadable. Fixing these short codes is an another chore on its own.

Which one do we prefer over another, you ask?

Well it’s a tough choice but…ACF! ACF and Visual Composer are serving two different audiences. ACF is focused on developers. Visual Composer on the other hand targets the people with little to no knowledge of website development. In case of both the builders. the audiences don’t need to have an extensive coding knowledge. Visual Composer focuses on making the website building experience as easy as it can be. Visual Composer is not made for complex websites it will only provide you with enough elements to get your website up and running.

Why ACF?

ACF does a commendable job with its active development and incredible support. The developers are constantly working to keep the plugin current. The heavily themed interface of Visual Composer is slow. The floating window takes time to load the elements, and the builder shows glitches when you switch from frontend to backend. Visual Composer is affordable for personal license but expensive for client work. ‘Advanced Custom Fields’ is more affordable and provides value for money. Another thing that doesn’t work in Visual Composer’s favor is that the pre-sales service and overall support for Visual Composer is terrible. It comes as no surprise that ACF has 900,000+ active installations compared to Visual Composer’s 500,000+. You can save your time and money with theme-based websites but you might not get the exact thing you’re looking for. Themes are designed keeping a universal requirement in mind. Your unique requirement might not fit in those templates everytime. But, if you have unique requirements and want the best for your website, then website builder is the right bid. Making custom websites is a hectic process. We can make that process easier. Our expert development team knows website builders like the back of their hands. Hit us up here if you’re looking for WordPress development partners.

How to use Macros with Twig in Craft CMS — DRY

Templating is one of the most commonly used processes in web development. It helps with easier management during the development & design process. Apart from the management, templating helps with keeping the visual consistency.

Craft CMS comes with a cool templating engine — Twig. And we love to use macros to work on redundant parts while working on a Craft CMS project. Macros can be compared to ‘functions’ in PHP also known as DRY templating in other languages. We usually use it to generate markups that have slight final variations in the implementation.

To simplify your code you must first make a visual hierarchy of the page you’re working on. That way you can determine the components you’re going to need. Make macros for those components in the twig templating engine.

Macro implementations can be changed based on the parameters passed to it. For instance footers, dates, images and other media are a recurring part of a website. You can make macros for these components.

Skeleton of Twig Macro

{% macro coolMacroName (parameter 1,…..) %} {content of macro goes here} {% endmacro %}

To call the macro – {% import ‘_macroFilename’ as ‘macroVariable’ %} {{ macrovariable.coolMacroName(parameter1, parameter2,….) }}

The best practice is to add the relevant macros to a file and then call the file as a variable. Use the variable to call the macro at the places you need.

The first Macro we use often is-

Macro for responsive image component in Craft CMS

You can reduce and automate a lot of work which goes in responsive image formatting. Utilize Craft’s ‘Image transforms’ with a twig for images and define your transform macros in it. You will also have to define different types of macros for different image formatting needs.

A macro for Device-pixel ratio adaptable fixed size images and other one for variable size responsive images. Also add an internal class to call it inside your twig image file for additional attributes.

Macro for video component in Craft CMS

Videos are an integral part of every website, so making a twig component for it seems practical, otherwise you will spend your precious time writing and tweaking html code for videos.

In the macro define the logic of the video component. The file should have proper information about the component, the parameters which are accepted, the value each parameter requires, and whether the parameter is optional or not. You also need to mention, what the arrays and objects are made of because without that information you yourself and other developers won’t know, what information can/must or cannot be passed while calling the component.

Making macros for date formatting in Craft CMS

Dates might look like a trivial part of a template but it gets tedious and complex when you have to define its format in every other template.

You can contain different modifiable date formats in a macro. It saves you the effort of having to define it time and again and maintaining consistency all along. Short or long, just define the format in a macro and call it wherever you need it.

Reduce repeated reference of paths in Craft CMS

Include tag in twig allows you to call a template within a template. Each one you make gets stored in /templates/ folder by default, even your include templates.

You can call these partial templates separately followed by the same path or make a macro instead to reduce the repeated reference of path.

To achieve code consistency, store your ‘include’ templates separately. So that you can call the include templates within the macro. You can also call your ‘include templates’ from multiple locations.

Final words

That’s pretty much it. Apart from few other variations, creating macros for page components is a good and effective way to reduce the redundancy and complexity of the code. You can always go through this detailed video for macros here.

We’ve been experimenting with several DRY techniques ourselves. It improves the speed of our work cycle.

How are you using Twig & its components? If you need help with your Craft CMS project, connect with us right away.

Craft Vs Perch: A Clash Of Customizable CMSs

In our earlier blogs we’ve favoured Craft CMS heavily because of its ‘content first’ philosophy. Perch also majorly focuses on the content but with functionality shredded down to the absolute basics. It’s so minimalistic and that it is considered to be appropriate for small-scale projects only. Anyways, Perch has its perks as compared to conventional CMSs. Let’s put it to the test against the reigning champion, Craft CMS.

Feature comparison of Craft & Perch

Craft is loaded with crucial features, vis-a-vis:
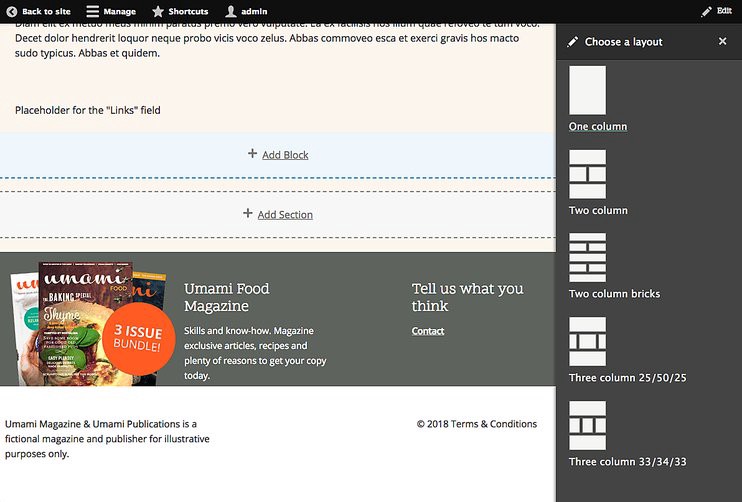
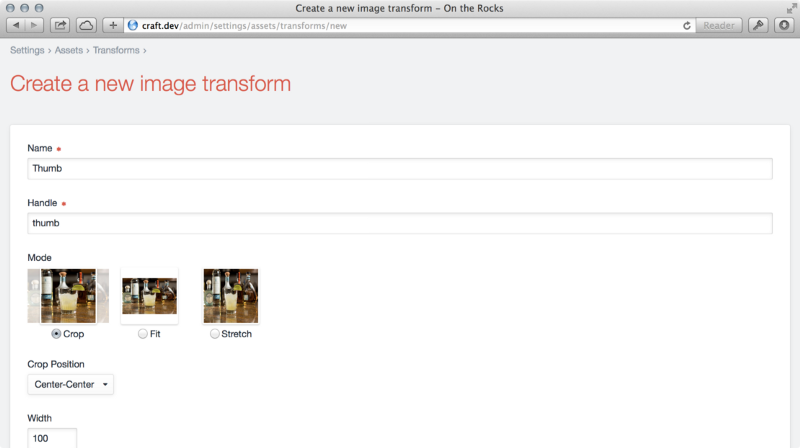
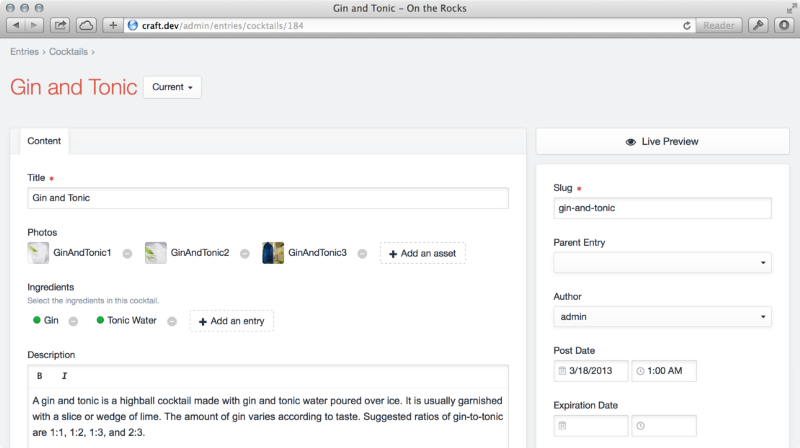
Live Preview

Craft allows you to review the edits as you’re making them in a split screen window mode.
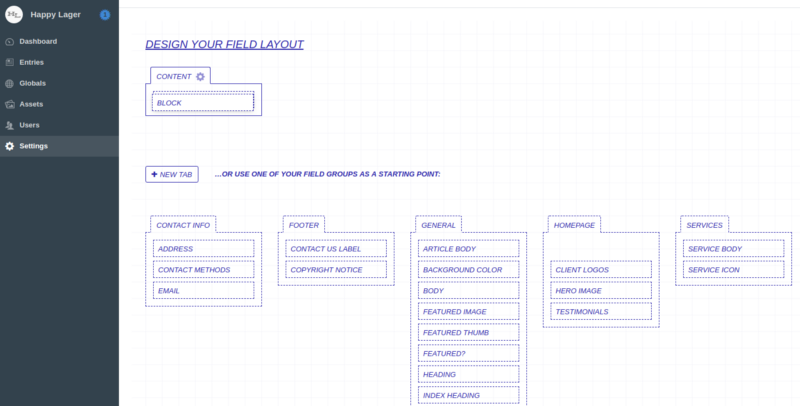
Matrix

Gives you the full control of your content, from layout and placement to the order.

Localization

You can create locales for the desired language and enable with just a click.
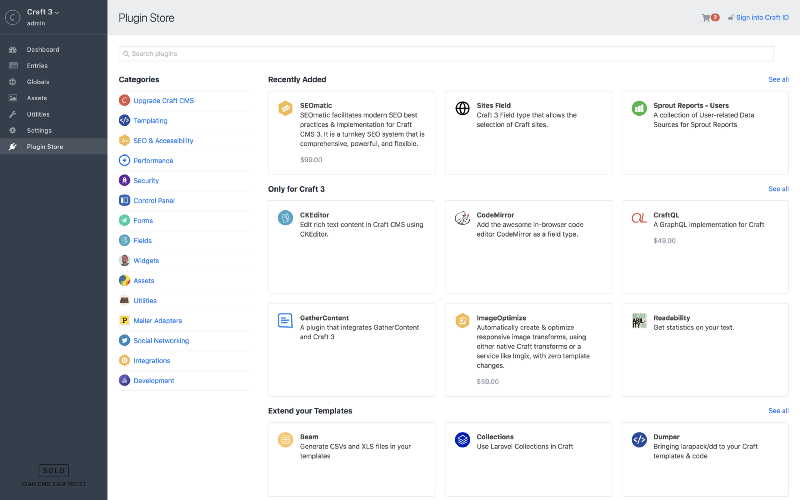
One-click updates

Simply update everything with one click from the control panel. The updater even notifies you according to the nature of the update; whether it’s incremental or critical.

Built from scratch

Craft CMS team clearly states that we don’t make any assumptions about your content. You get full control of your website and you can craft it the way you want. On the other hand, Perch has the following features to offer:
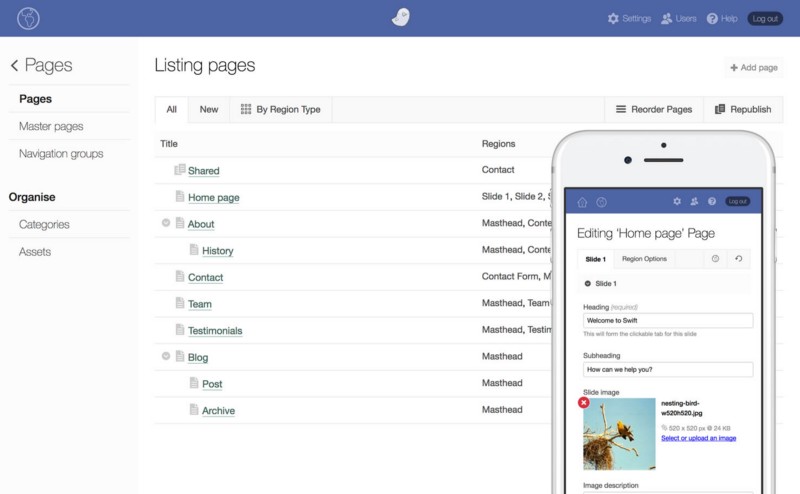
Preview

You get to see the changes only after when they are saved in the draft. A bit old fashioned to be honest but it goes with Perch’s tagline of ‘a very little CMS’
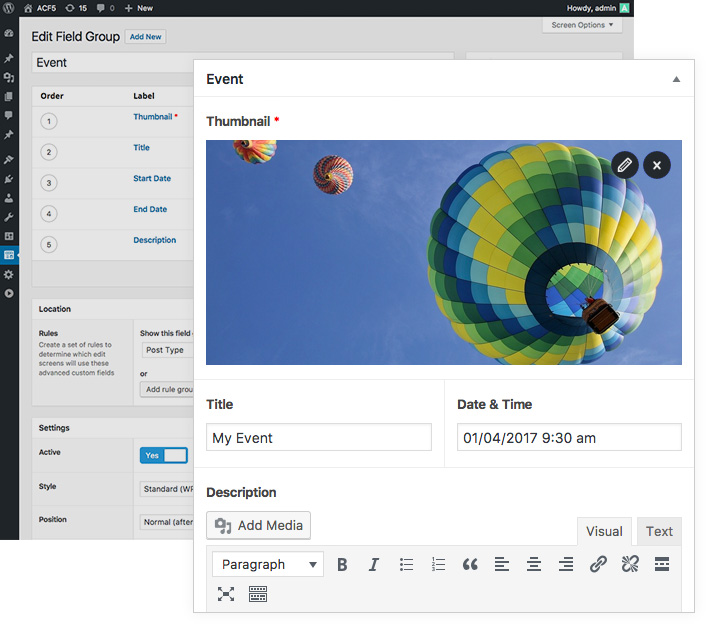
Custom Fields

The feature lets you create custom fields throughout the page.

Localization

Perch lets you localize your webpages by creating separate pages or duplicating regions for each language.

Updates

Updating in Perch is a bit cumbersome. You need to replace the old files with the new ones.

Retrofit or build from scratch

You can retrofit an existing website or build a minimal website from scratch.

Documentation comparison of Craft & Perch

Documentation is a crucial part of a CMS. It is important to define the features and inner workings of a CMS so that the new users know how to use it. It’s a map for the CMS users. Documentation, if not done properly, might mislead your users. There is nothing more off-putting than lack of documentation. Users are trying to find their way around the new CMS and if there is no good map, they’ll probably get lost and bounce-off faster than light from a mirror.

Craft

As far as the documentation is concerned Craft excels at it. You will immediately find everything you’re looking for. From update logs and feature definitions to essential how tos; Craft’s documentation has got it all.

Perch

Being the older CMS of the two, extra years in development hasn’t added much in favour of Perch CMS. Perch documentation is enough to get a hold of the basics but it disappoints when you’re half-way into the development process. Especially when you’re trying to give additional functionalities to your CMS with add-ons.

Community Support comparison of Craft & Perch

Documentation can only do so much, the real knowledge and solutions are derived from the dedicated communities formed around the CMS. The community makes up for the lack of documentation and helps you solve on-site issues.

Craft

Craft has a proactive community of dedicated developers and users that help to keep Craft as current as it can be. The Craft community just keeps growing as more people fall in love with the CMS.

Perch

Perch doesn’t aim to be a big CMS and hence it remains that way with 0.1% of the market share. It has a simple and functional CMS to offer but it’s not backed by convenient documentation and a good community support.
  • Perch Slack channel is no longer active
  • 3725 followers on Twitter
  • 615 fans on Facebook

User Interface comparison of Craft & Perch

User interface determines how you interact with the content. Both the CMSs provide you with a dashboard to edit and manipulate your content using the interface. The simpler the interface the lesser the struggle to understand it.

Craft

Craft focuses on providing powerful and bespoke results. The interface hence is equipped with essential functionalities to handle large amounts of data gracefully. Although it is considered to be highly-technical and dev-friendly, Craft CMS offers a conveniently easy drag and drop interface for layout design.
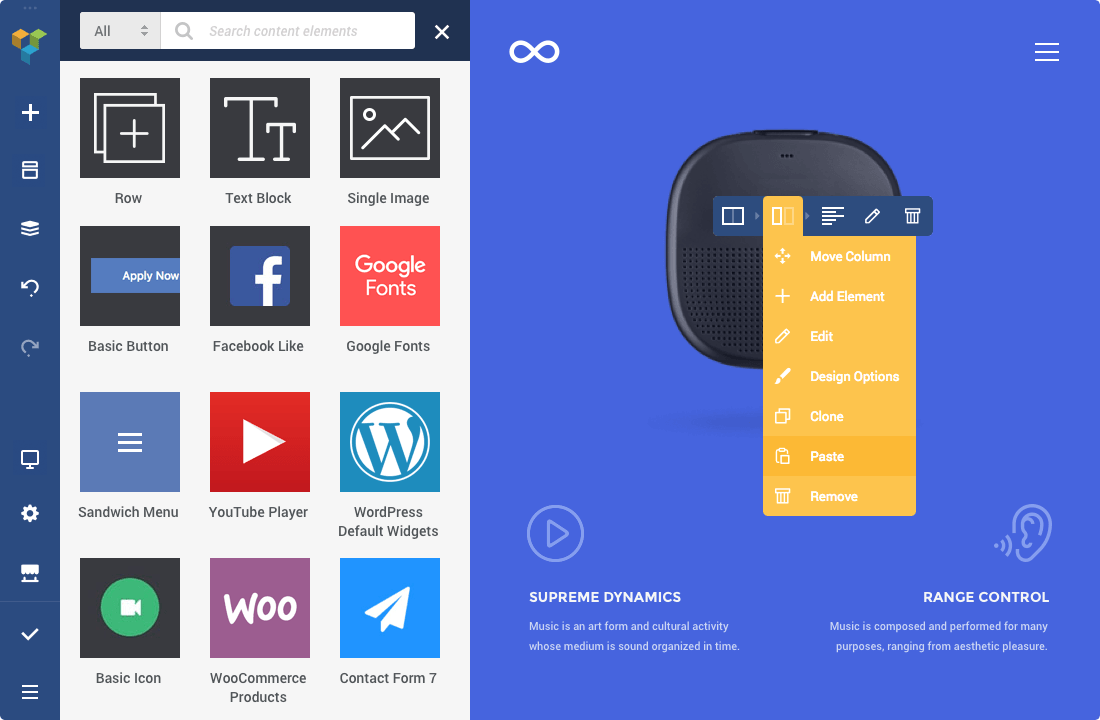
Perch

Perch on the other hand stays true to its principle of being basic with the user interface too. It is comprehensive and doesn’t require extensive technical expertise. However to people who want more control over their content it is basically under equipped.

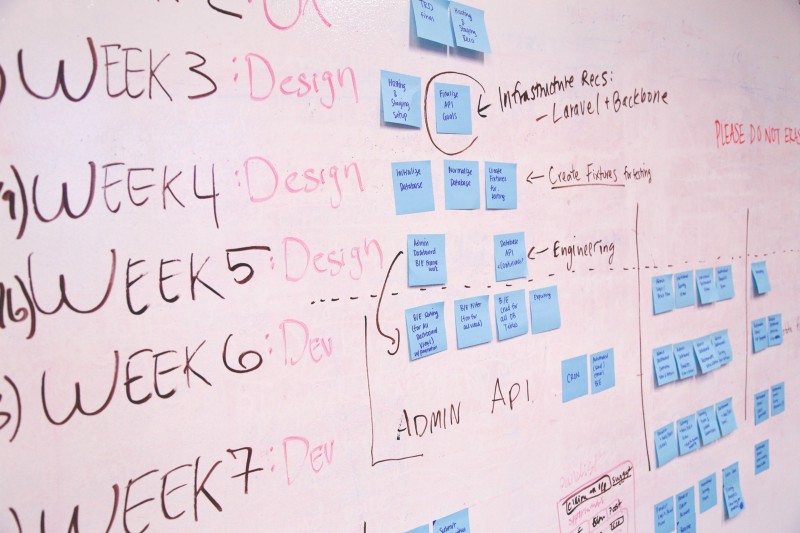
Development Cycle comparison of Craft & Perch

Craft uses an unconventional and complex data structure, hence the bigger learning curve. Singles, structures, and channels as data structures give you unmatched control and editing capabilities. For front-end development Craft utilizes Twig templating engine for advanced templates and data manipulation. Perch uses PHP functions for the development as compared to Twig in Craft. The content structure is pretty straight forward, it features pages, regions, and shared regions for data manipulation. For the added functionality of reusing content throughout the page you need to upgrade to larger version of Perch which is Perch Runway. Both the CMSs have their benefits but it is rather important and practical to go with the CMS which is flexible and future-proof. While Perch is a straight forward CMS which doesn’t try too hard to be something it’s not, it is only good for small projects and businesses with a tight budget. On the contrary, Craft CMS provides necessary functionalities paired with high-end security. It is a capable and viable choice for both developers and content editors. Looking at the security track record of Craft we’ve always chosen Craft CMS over every other CMS for our clients. In case you are confused about how

How to migrate a Craft 2 project to Craft 3?

Craft 3 update changed a lot of things. Added functionalities aside, the process of installing and maintaining the CMS also changed with this breakpoint release.

Craft 3 almost makes it necessary to migrate your website from Craft 2. It is better in every aspect, including security and the extended plugin store. The store comes with plugin trials and 30-day license return policy.

For the incremental updates, you just had to click on a button. But with the breakpoint release, Craft CMS tweaked its ways of handling things.

It is advised to get an expert’s help for the migration because there are a lot of things that can go wrong with the migration, for instance:

  • Control panel prompting to install Craft instead of the update database dialogue.
  • Database configuration settings which are no longer needed

Also, to avoid errors, you have to follow the same naming schemes that were used in your old database; like using same prefixes with the new database connection settings.

There are two steps involved in the migration process of a Craft 2 project.

  • Craft 3 Installation
  • Manual Migration

Step 1: Craft 3 Installation

To install Craft 3, follow the same steps as mentioned in ‘How to setup a new Craft CMS project’ and then proceed with the migration.

You need to take care of the following requirements before proceeding with the installation:

  • Craft 3 requires PHP 7+ and at least 256 MB of memory for PHP
  • The installation requires Craft 2.6.2788
  • Make sure that your plugins are ported to Craft 3 (check the status at the bottom of the update page)
  • Keep a backup of your old database.

After the installation, proceed with the migration process. According to the Craft 3 upgrade documentation following are the steps you need to follow to migrate your Craft 2 project to Craft 3.

Step 2: Manual Migration

Import your database connection settings from your old database file craft/config/db.php to your .env file in the Craft 3 directory.

Now copy the following settings and configuration files from the old Craft 2 directory to the new Craft 3 directory.

  • Copy settings from craft/config/general.php to config/general.php
  • Copy craft/config/license.key file to config/
  • Copy configuration files from craft/config/redactor/ to config/redactor/
  • Copy files from craft/storage/rebrand/ to storage/rebrand/
  • Copy photos from craft/storage/userphotos/ to storage/userphotos/
  • Copy templates from craft/templates/ to templates/
  • Copy the changes made, if any, from public/index.php file to web/index.php file
  • Copy other files from old public/ to web/ directory.

After copying the files to the web/directory, update the web server to point to it. Enter the Craft’s control panel URL in the browser. It should prompt you to update your database.

Known problems with the migration from Craft 2 to Craft 3

If all goes well you will be able to run the latest Craft 3 with your old database intact. If not then you might be facing the following problems.

Craft installer pops up when accessing the control panel

Your old database connection settings are not matching with the new .env file. It is most likely happening because of a wrong DB_TABLE_PREFIX.

“Setting unknown property:

craft\config\DbConfig::initSQLs” error.

The initSQLs database configuration setting was used in Craft 2 to fix MySQL 5.7 support. It is redundant in Craft 3. Remove the line beginning with ‘initSQLs’ in the config/db.php file to delete the setting.

To avoid major hassles and loss of database, it is recommended that you get a Craft partner onboard. In case you have further queries, you can connect with our Craft CMS experts here.

More Craft CMS Features: Matrix and Its Powerful Friends

Craft CMS’s consistency can be seen in its regular updates & latest features. Matrix is one of those early features that helped Craft dominate the CMS game. Matrix is the protagonist of the Craft’s story since its inception but there are some unsung heroes that need some attention too.

Categories & Tags in Craft CMS

Categories and tags is one of the most powerful features of Craft CMS for content classification. It allows you to organize your content by defining a taxonomy beforehand. You can create category groups from which, the categories are assigned to different entries.

Define Taxonomies with Category in Craft CMS

To define a Taxonomy you have to create a parent group to accommodate different categories in it. Go into categories section in settings. Inside it you can create a parent category group to define a taxonomy.

Meta level categorization with Tags in Craft CMS

Craft supports folksonomy as well. You can categorize the content with the help of electronic tags to define a folksonomy. The process of creating tags and tag groups is same as the categories. Create a folksonomy from the settings. Assign to the entries in the tag field. Tags provide meta level categorization which also helps in SEO. Categories & tags will help you create a content structure which makes your content consumable.

Matrix in Craft CMS

In our earlier blog about ‘why to choose Craft’ we listed Matrix as one of the defining features of Craft CMS. The feature lets you create and manage content blocks. You can add, reorder, and move content blocks; be it text, code, or rich media. And the coolest thing about the content blocks is that the reordering doesn’t affect the code in the template. One of the key benefits of the matrix field is that you don’t have to rely on predefined themes and their content structures. The only problem with the thematic approach is that you have to make-do with whatever the theme designer deemed right. The sections are made of fields, which are made with content blocks and using these content types we create entries. The matrix is a multi functional field which can accommodate almost every type of entry.

Where to find the Matrix?

You can find the matrix in the sections where you define field type and the amount of blocks the field is going to have. Just select matrix from the field type drop down and configure it accordingly. If you want a minimalistic powerful website with necessary content elements then Craft’s Matrix field is the answer.

Image Editor in Craft CMS

Before Image Editor’s introduction in Craft 3, the only options to edit the images were through Image Transforms or with plugins like Tiny image. Craft’s inbuilt Image Transform lacked essential editing elements and was only helpful in defining universal image rules. Image editor on the other hand provides a rich editor which lets you crop, rotate, flip, and straighten images. You can even manually set focal points for responsive images. Edits don’t affect the quality of the image and can be overwritten or saved as a new asset. You can access the image editor from assets in the control panel:
  • Open control panel
  • Click on the assets
  • Select an asset
  • Click on the drop down with a gear icon on it
  • Select edit image

Image Source:craftcms.com

Edit image option will open the image editor for the selected asset. Overwrite the changes with save button or save the image as a new asset.

Plugin Store in Craft CMS

Plugins are mini applications for added functionality. There are more than 200 plugins in Craft CMS’ plugin store, each one enhances Craft in one way or another.

Image Source:craftcms.com

Plugins are infamous as vulnerability of WordPress but that’s not the case with Craft because:
  • It has One-click installation and updation.
  • It has centralized license management.
  • It allows you to try a plugin before you buy it, on a non-public domain like Craft.test.
  • It has a 30-day return policy on paid plugins licences.

One-Click Updates in Craft CMS

All the functionalities are a waste if you have to update them one by one. Craft solves this problem like a real problem solver via one-click update feature. Craft alerts you in the control panel with a notification badge and its clever designing allows the system to notify according to the update priority. For example; if it’s just an incremental update, it would just show a notification badge and if it’s a critical update the control panel will turn red. Update priority is one of the most practical & essential elements on Craft CMS.You can’t possibly miss a critical update with the control panel turning red. Critical updates are meant for security enhancements or to fix a vulnerability. Skipping them leaves your website vulnerable to attacks. Craft’s one-click update provides all the incremental and critical updates in a ready-to-install package. It is easy that way and no one skips any important updates.

Relations with entities in Craft CMS

You can link entries, assets, categories/tags, & users — the four relational field types — using Craft’s Relationship engine. For example you can relate a case study with the services page section to show which services were used during the development process.

Creating relationships in Craft CMS

  • Create a new entries field
  • Select the sources from which entries will be taken
  • Drop the new field in the layout of the desired section

Image Source:craftcms.com

You can find the new category entries field in the section, while creating a new entry. Now you can relate content elements to each other. These basic Craft features have made website development a complete new ballgame. We have partnered with agencies and companies for extensive Craft CMS projects. To know how we roll our dices, ping us here.